As I wrote earlier, I will install Ubuntu in a virtual machine, but on a real SSD drive that is passthrough into the virtual machine as an RDM drive. This is done so that Ubuntu can run directly on the hardware, not through the hypervisor. Stuck in the USB stick with boot loader grub - loaded hypervisor VMware ESXi from a small SSD-drive and it automatically starts a virtual machine with Ubuntu from a large SSD-drive. Pulled out a flash drive with a bootloader - Ubuntu is loaded directly on the hardware from a large SSD-drive.
To start, download the installation image of Ubuntu Mate 18.10, open the link and download the iso-file with the installer.
Next, create a virtual machine and run it from our iso-disk.
Installing.
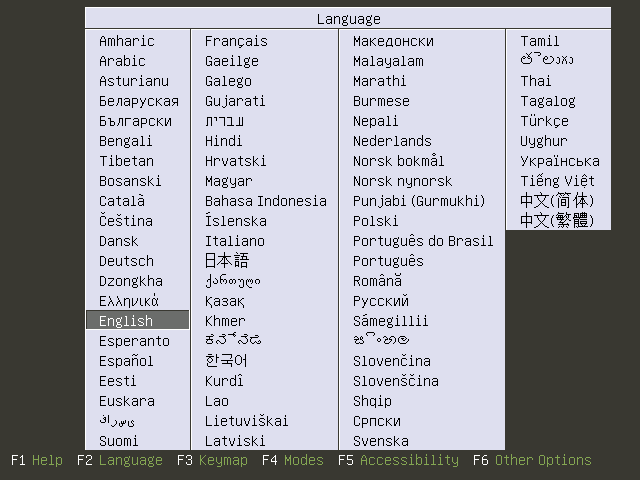
On the first installation screen, we need to select the language of the installer. I do not recommend to choose Russian at this stage, because in addition to the Russian interface of the installer, in Russian will be called directories in the home folder of the user - Desktop, Documents, etc., which will bring a number of inconveniences in the future. Therefore, select the language English and press Enter.
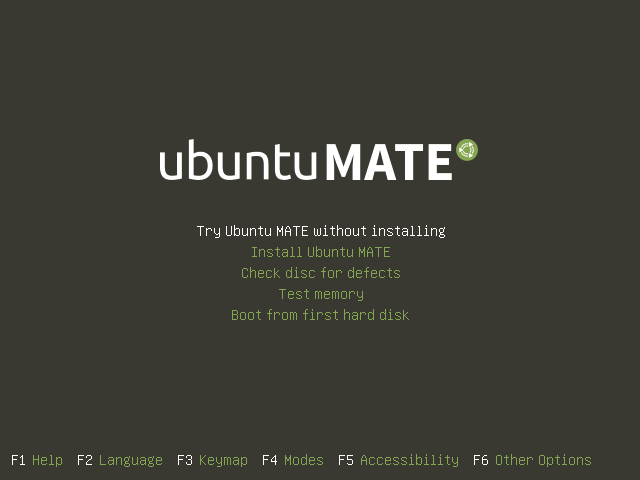
In the main installer menu we are offered to Try Ubuntu MATE without installing, Install Ubuntu MATE, Check disk for defects, Test memory and Boot from the first hard disk. Select Install Ubuntu MATE and press Enter.
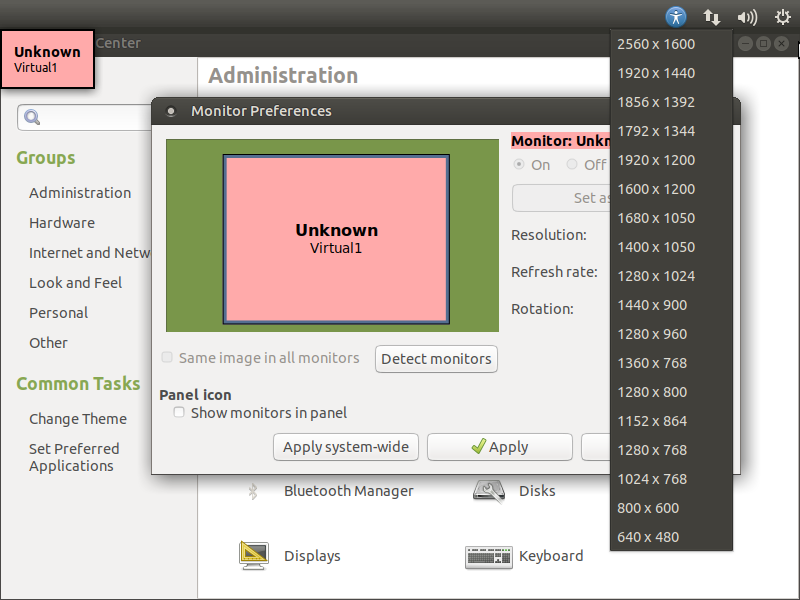
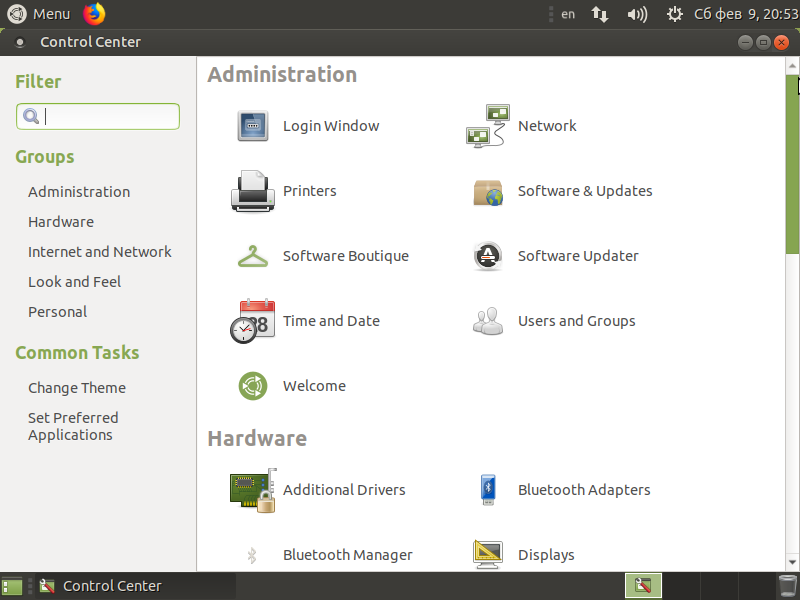
With the default driver, the Ubuntu Mate installer runs in Parallels Desktop with a resolution of 1400x1050, and in VMware ESXi with a resolution of 800x600. For convenience of further installation it is better to change it at once. To do this, press Ctrl+Alt+T on the keyboard – we will start Mate Terminal, in it we execute the command mate-control-center to start the Mate Control Center.

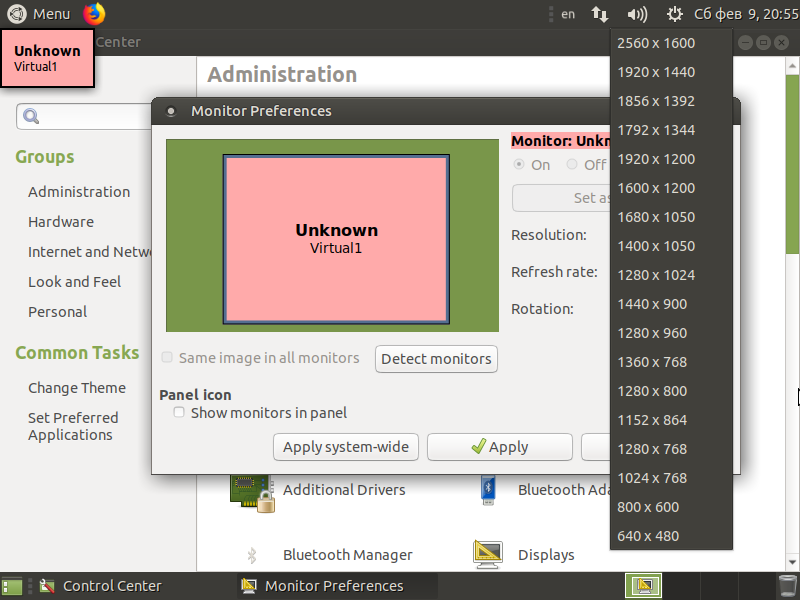
In the control center in the Hardware section, select Displays. Next either lucky or not lucky. In the case of Parallels Desktop, only two resolutions are available: 1400x1050 and 800x600, in the case of VMware ESXi, a range of different resolutions are available to choose from. Choose any you like and click on the Apply button, then in the dialog box that appears, click on the Keep This Configuration button.
After changing the resolution, close the control center, the terminal and return to the installer.
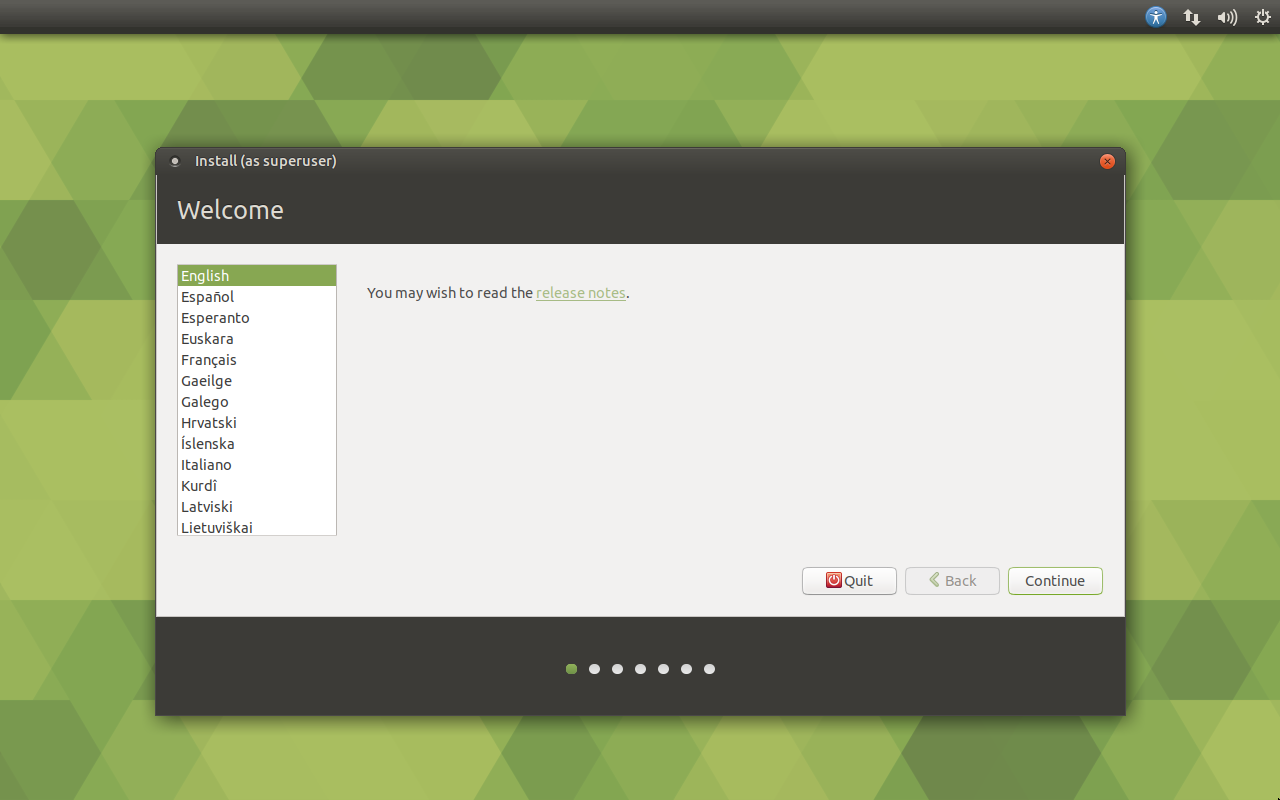
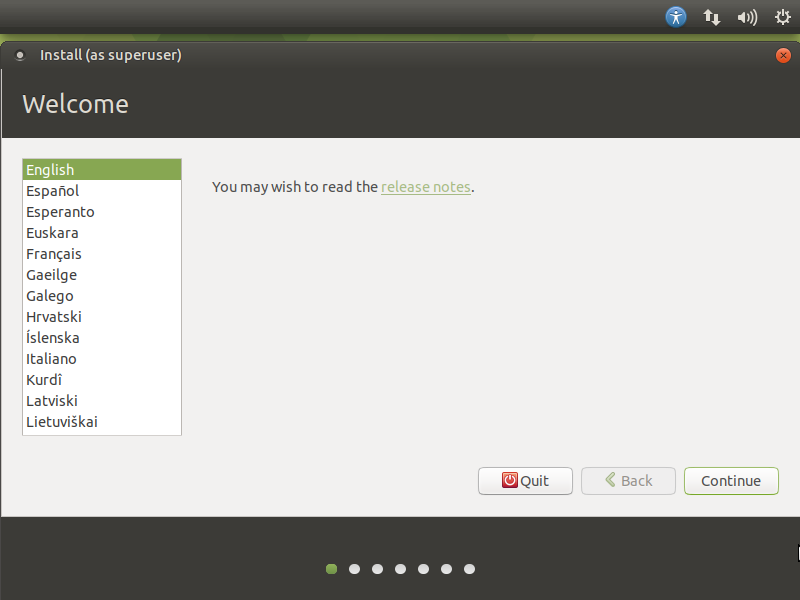
Leave the selected language English and click on the Continue button.
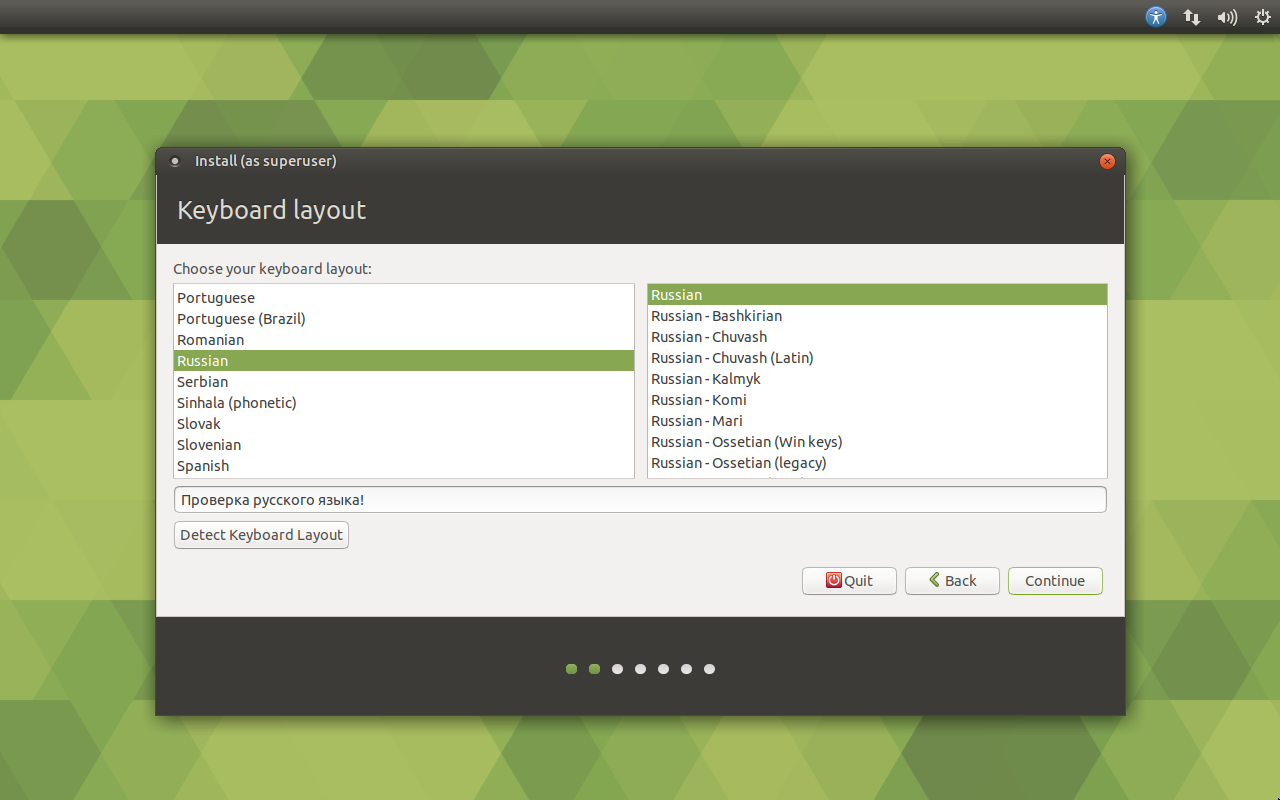
Next, select the keyboard layout. Here you can already select Russian in the left and right lists of languages, and then click on the Continue button.
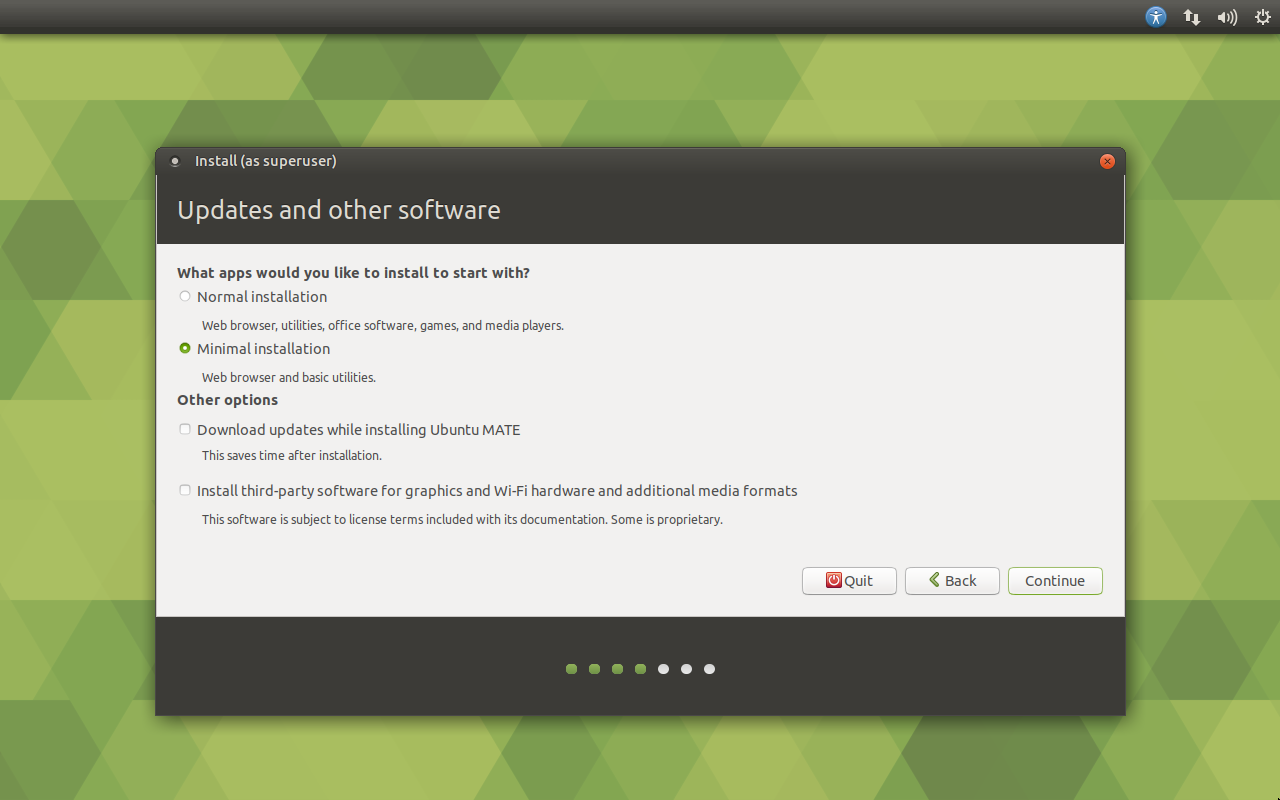
Now you need to select the installation option – normal or minimal and a couple of options. Select Minimal installation for minimal installation, remove the check mark from the item Download updates while installing Ubuntu MATE (since this time we still will not save and immediately after the installation will need to update the system). Then click on the Continue button.
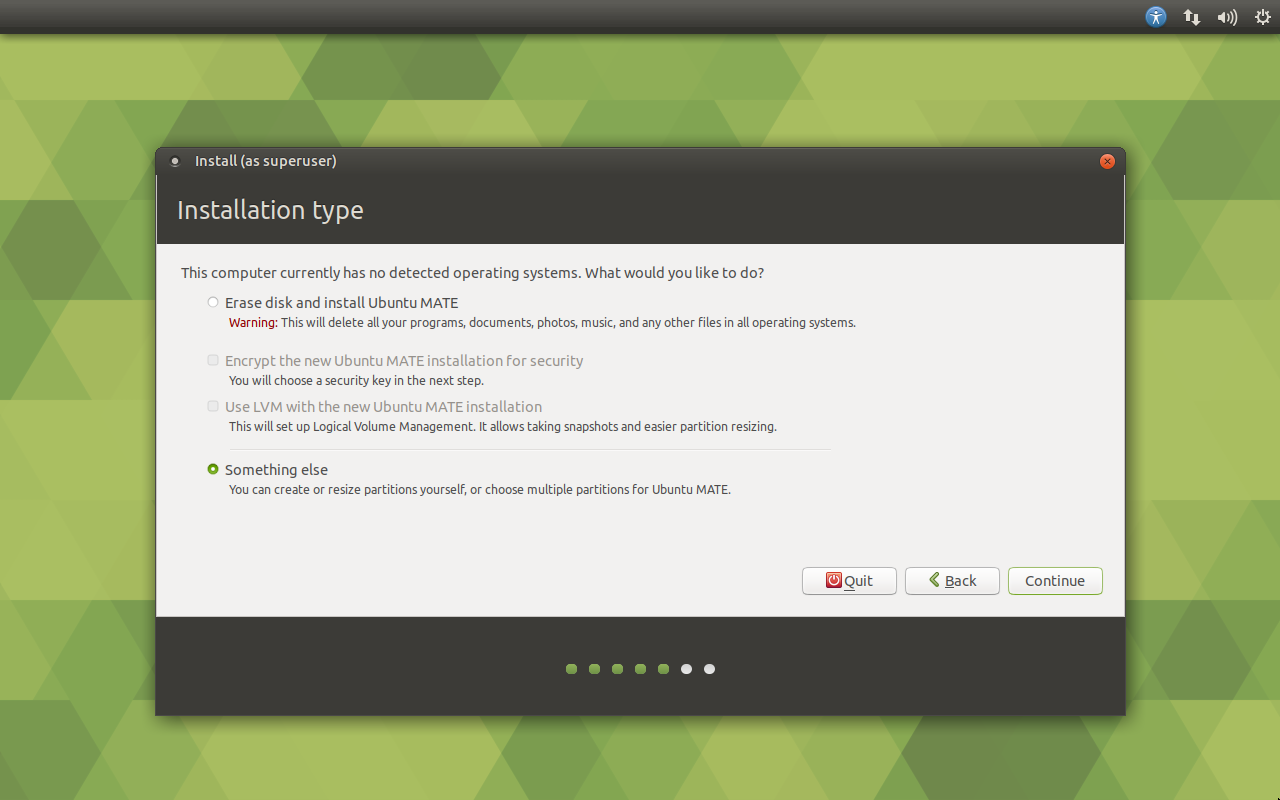
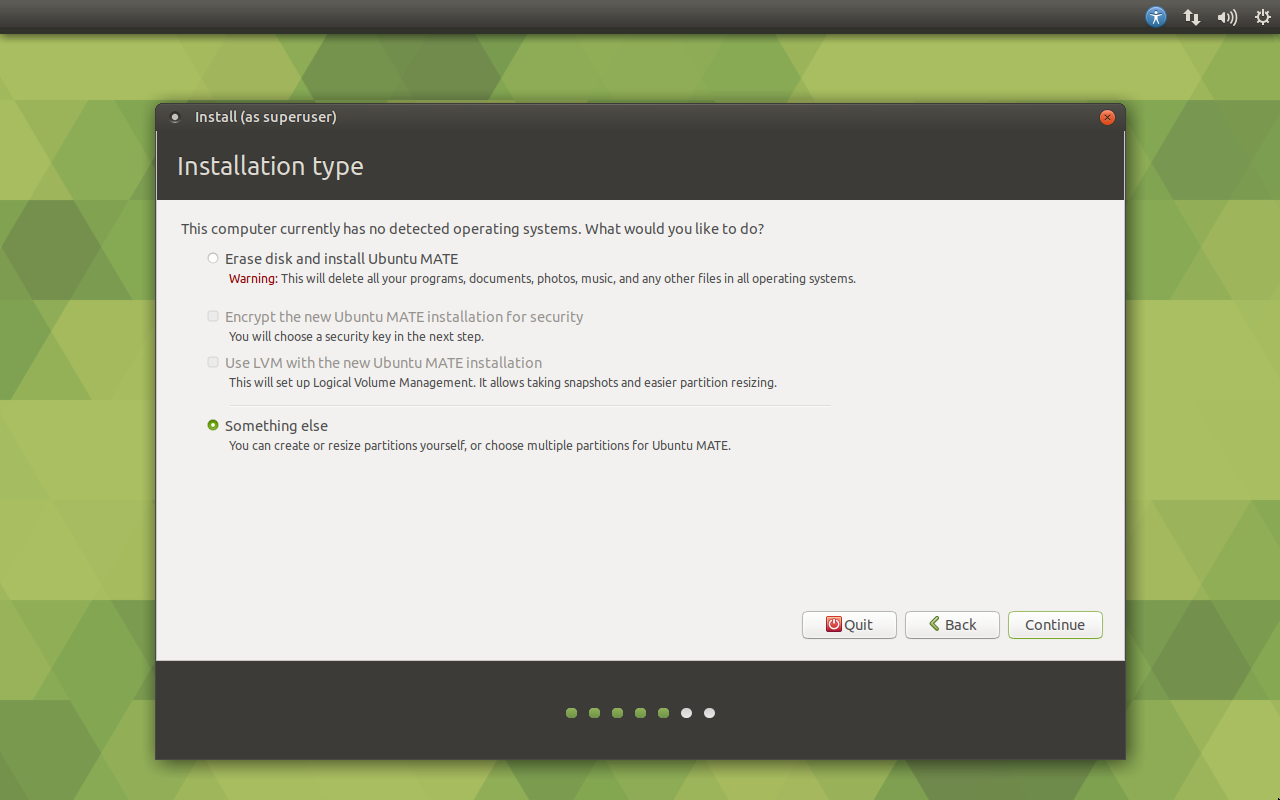
Now you need to choose the option of partitioning our disk. Item Erase disk and install Ubuntu MATE just create multiple partitions on the disk (/ root partition, /boot partition and swap partition). The Use LVM with new Ubuntu MATE installation item will do the same but using LVM. It would be possible to choose this option, but, unfortunately, the Volume Group under this option will be called ubuntu-mate-vg, and this contradicts my concept of Feng Shui. First, the presence of dashes in the name of the Volume Group - in itself evil, and secondly when you run the command df -h on the left side of the screen will be the huge path to the filesystem. Therefore, select Something else, to manually partition the disk, and click on the Continue button.
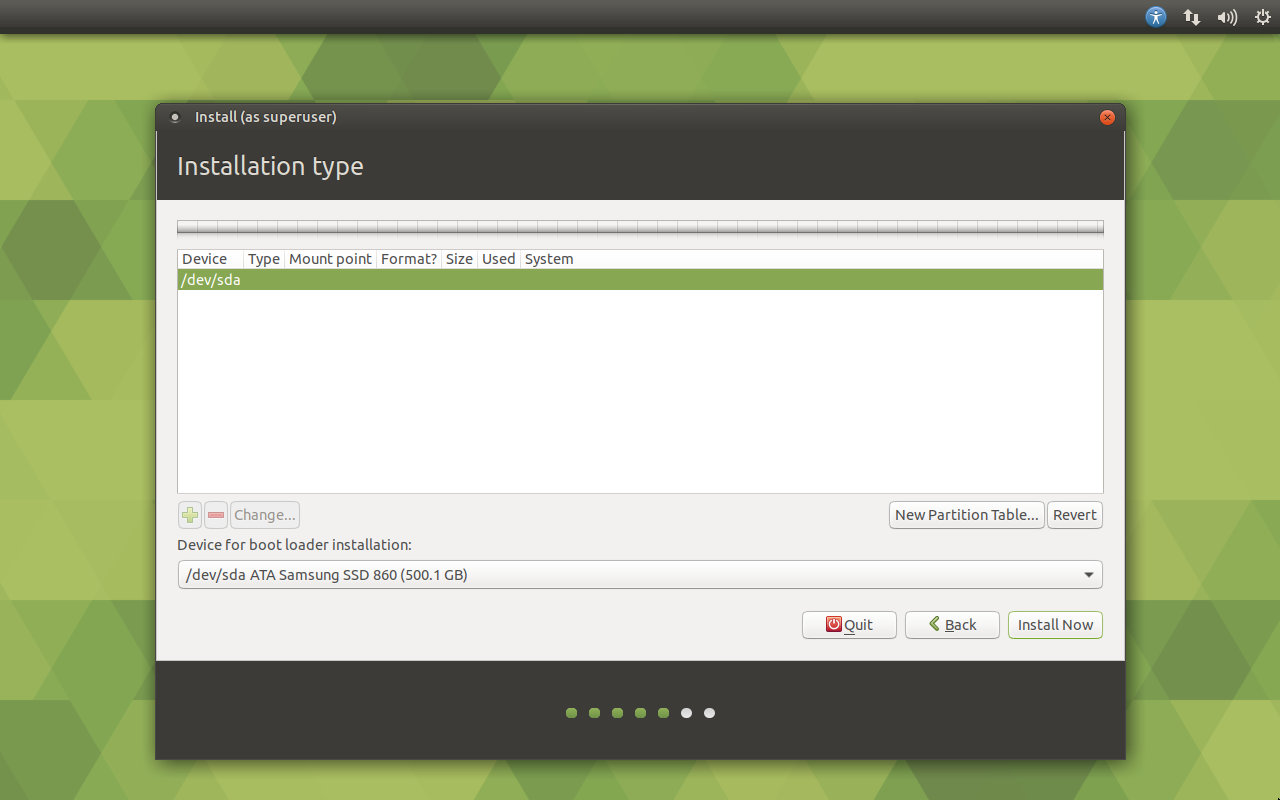
Next you need to partition our disk and create LVM. To begin, click on the New Partition Table....

In the window that appears with a warning that all partitions will be deleted, click on the Continue button.
Next, select the line free space and click on the button with the image of the plus. The developers of Mate, unfortunately, do not give us the opportunity to specify the size in the normal values of GiB, so will have to banish. Select Mount point - /boot and specify the size of 1074MB (1.0 GiB), then click on the OK button. Then again, select the line free space and click on the button with the image of the plus.

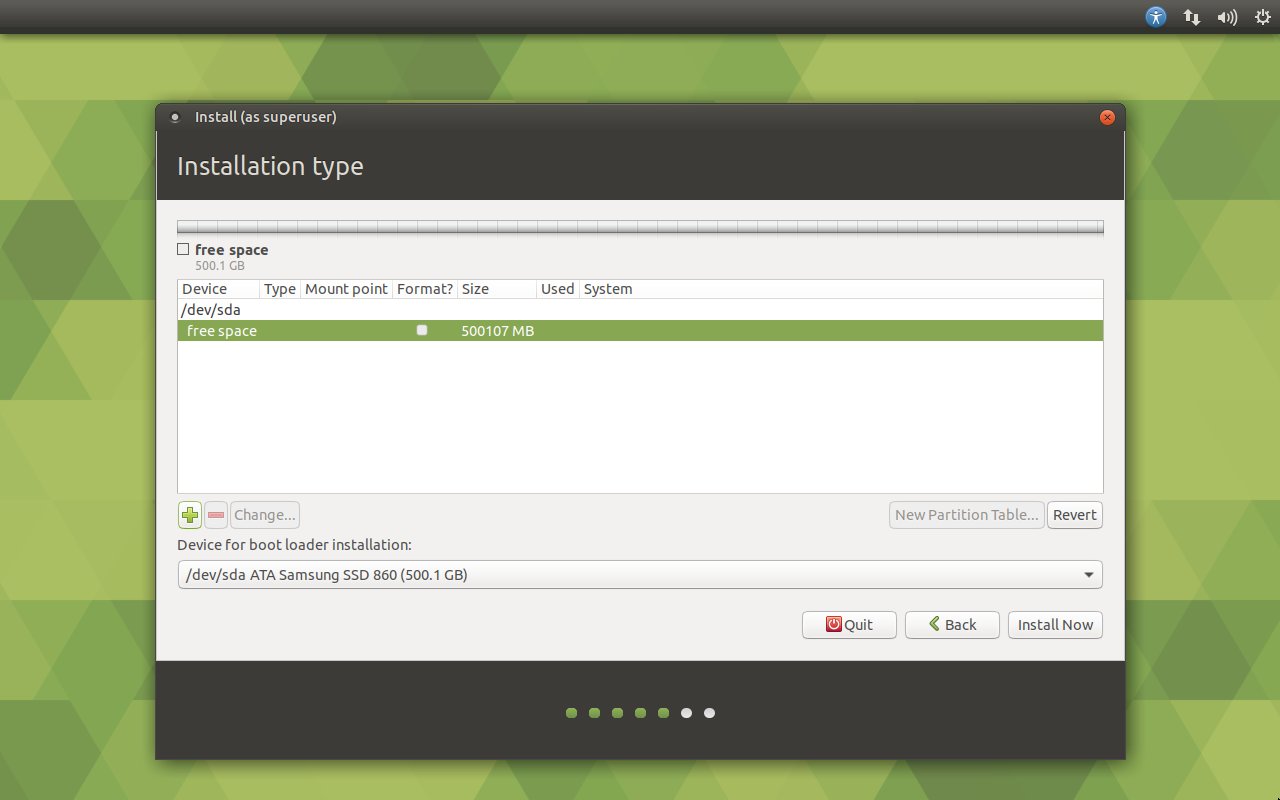
And then we realize that when you partition the disk manually - you can not use LVM, because the installer does not provide such a possibility. Therefore, in the section creation window, click on the Cancel button, and then click on the Back button.
We'll partition the disk manually. To start the terminal press Ctrl+Alt+T.
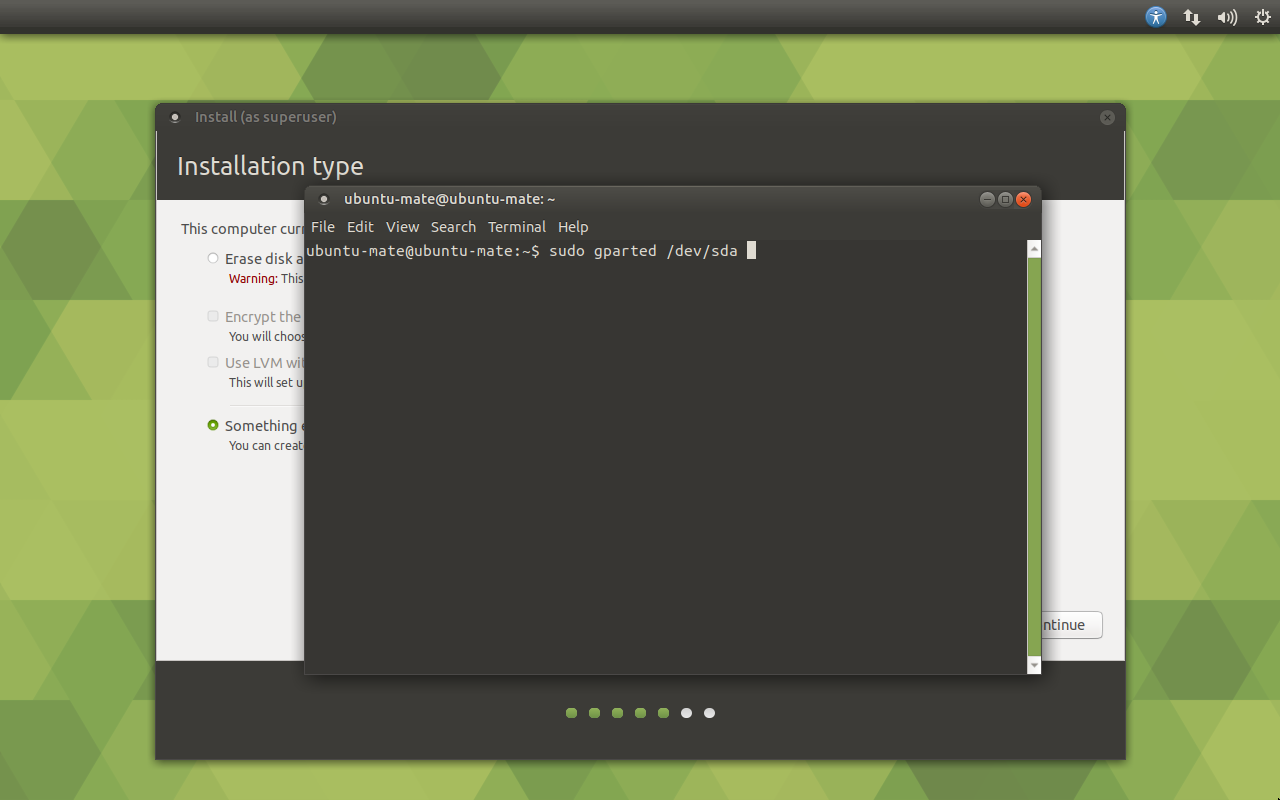
Then enter the command sudo gparted /dev/sda.
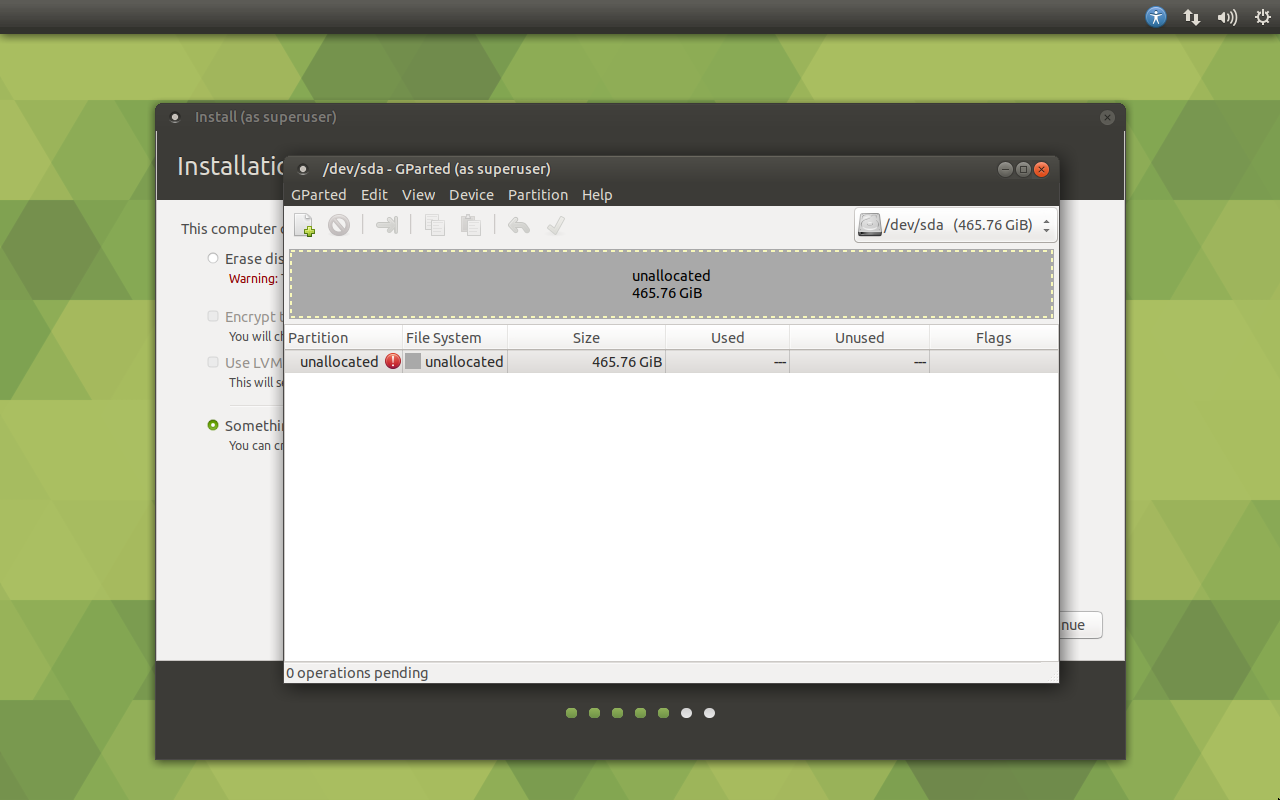
Since the disk is completely empty, the first thing to create a partition table, select the Create Partition Table... item in the Device menu. Select the type msdos (MBR) and click on the Apply button.
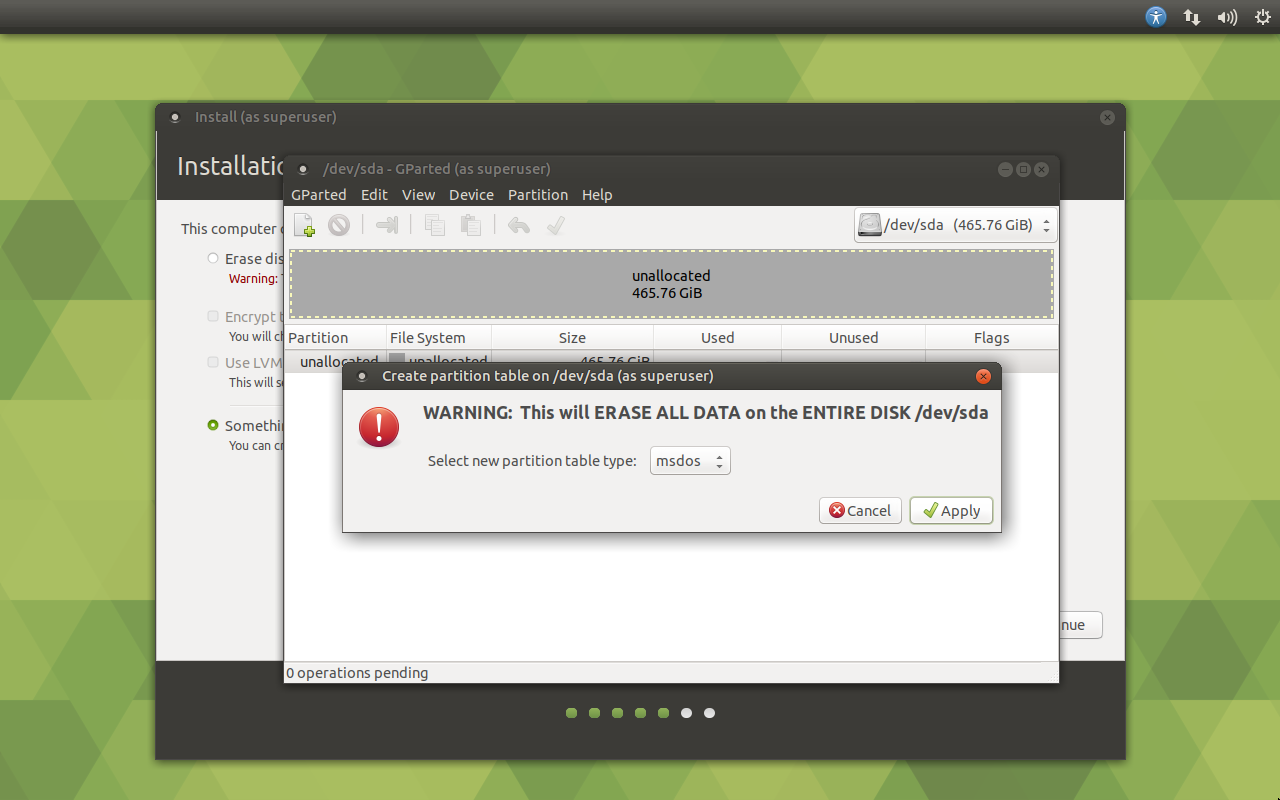
I don't want to create a separate partition for
/boot, I want to make only 1 partition for LVM, so I have to use MBR partition table instead of GPT, otherwisegrubboot loader will have no space to be installed.
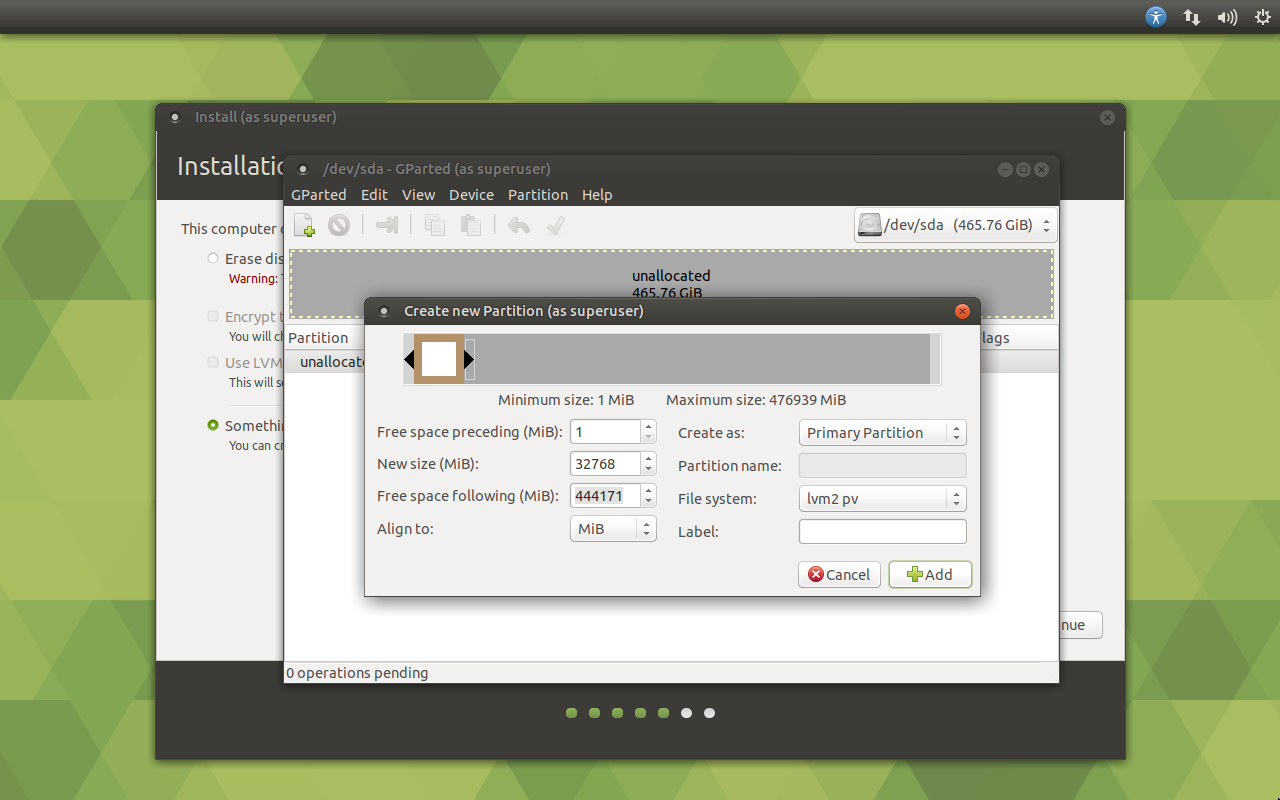
Now create a primary partition for Ubuntu to do this, click the right mouse button on the unallocated area of the disk and select New. Specify the size of the partition 32768 MiB, select the type of file system lvm2 pv, then click on the Add button.
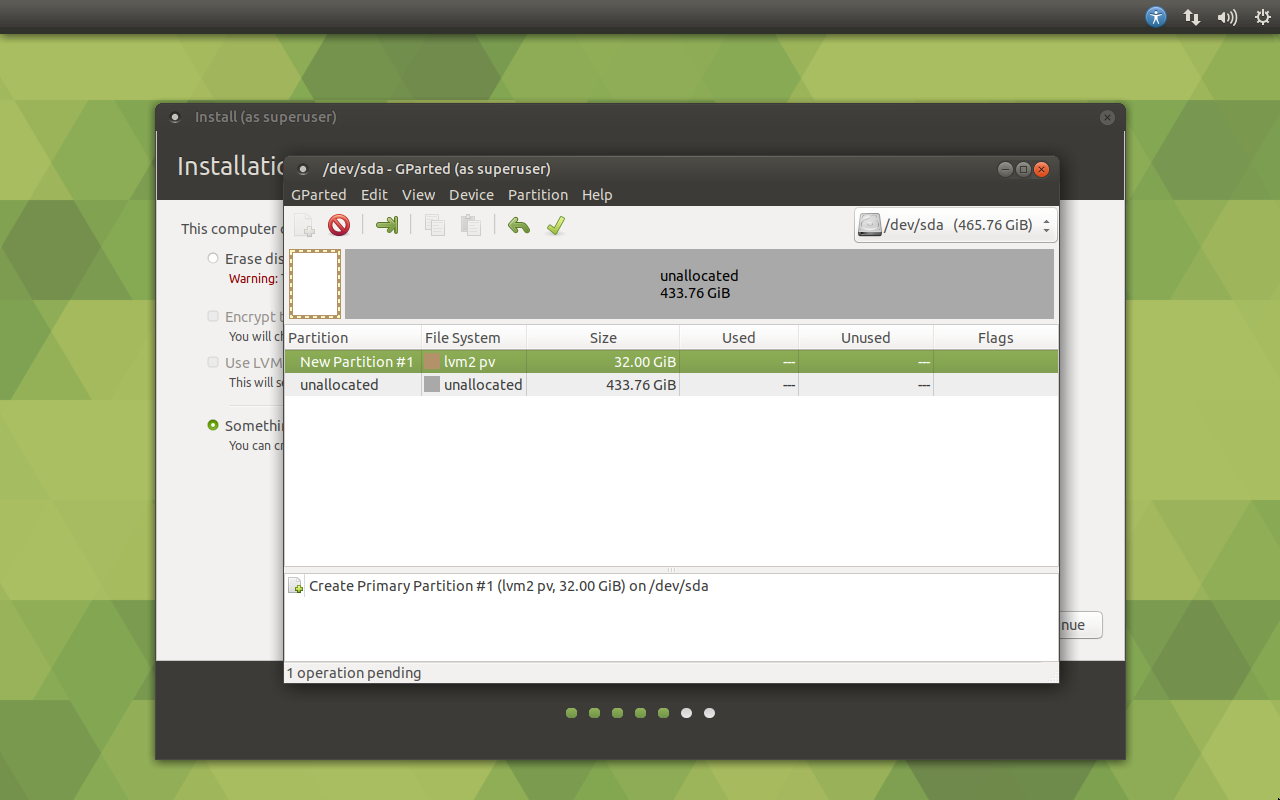
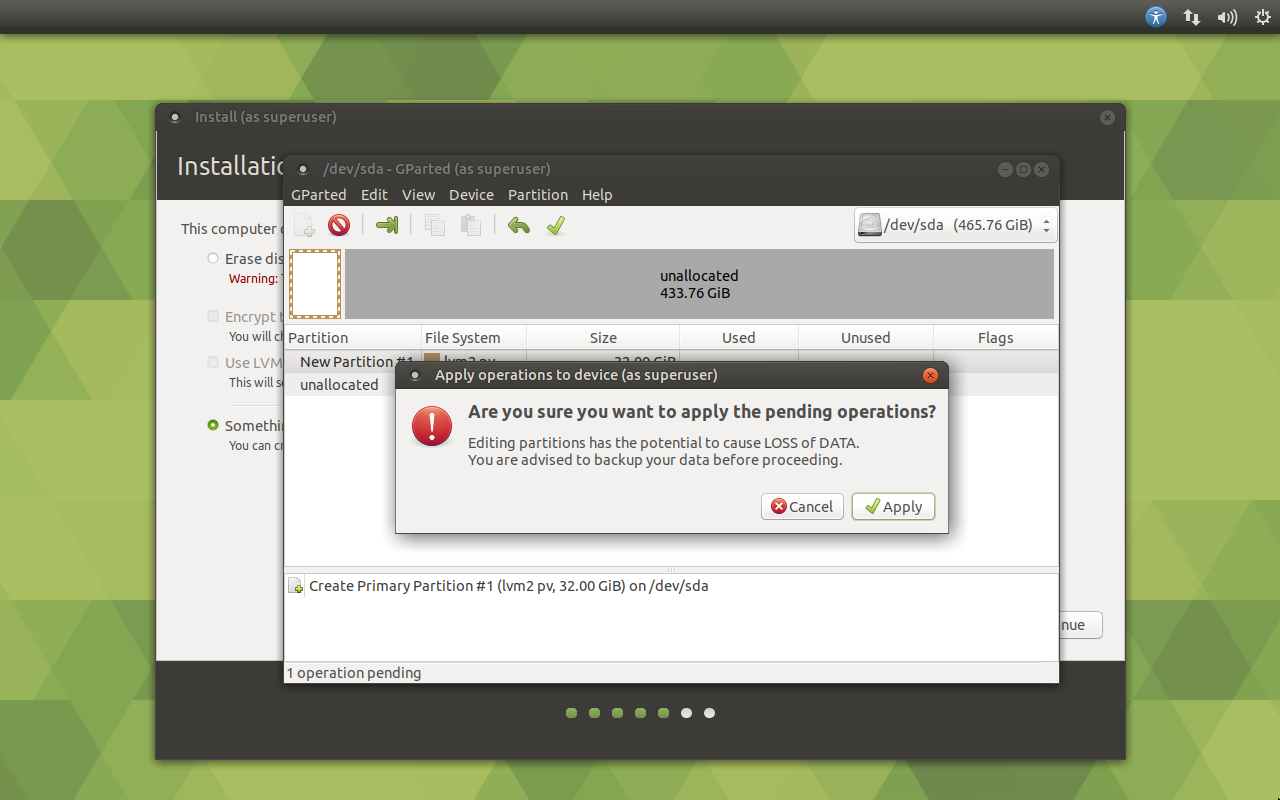
To write all changes to the disk, select Apply All Operations from the Edit menu. In the pop-up window warning click the Apply button.


Then close the window with information about the completion of the disk partitioning and close GParted.
Next, in the terminal, run the following commands:
$ sudo vgcreate vg_radio /dev/sda1
$ sudo lvcreate -n lv_root -L 24G vg_radio
$ sudo lvcreate -n lv_swap -L 4G vg_radio
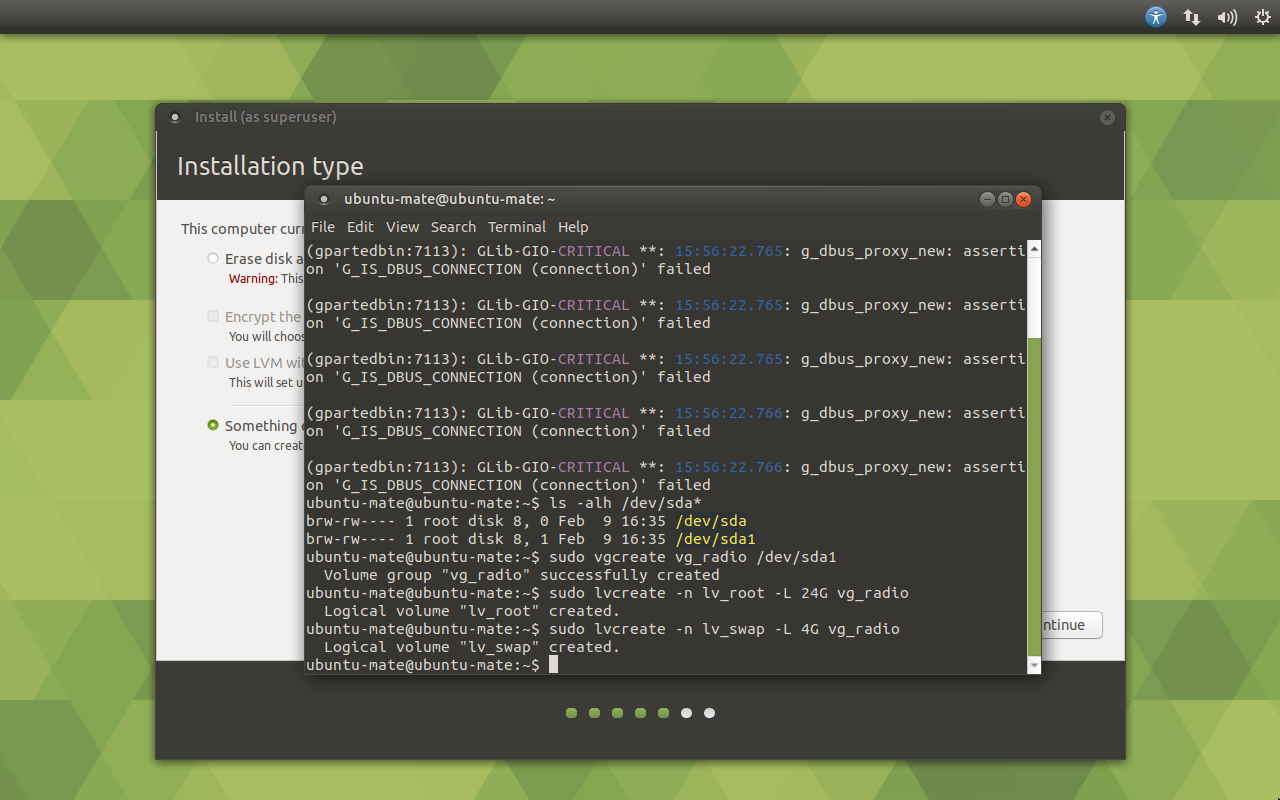
Here I use the volume group name vg_radio because vg is the volume group and radio is the future hostname of the virtual machine. And the sections in the names of lv - is logical volume, and root and swap their purpose.
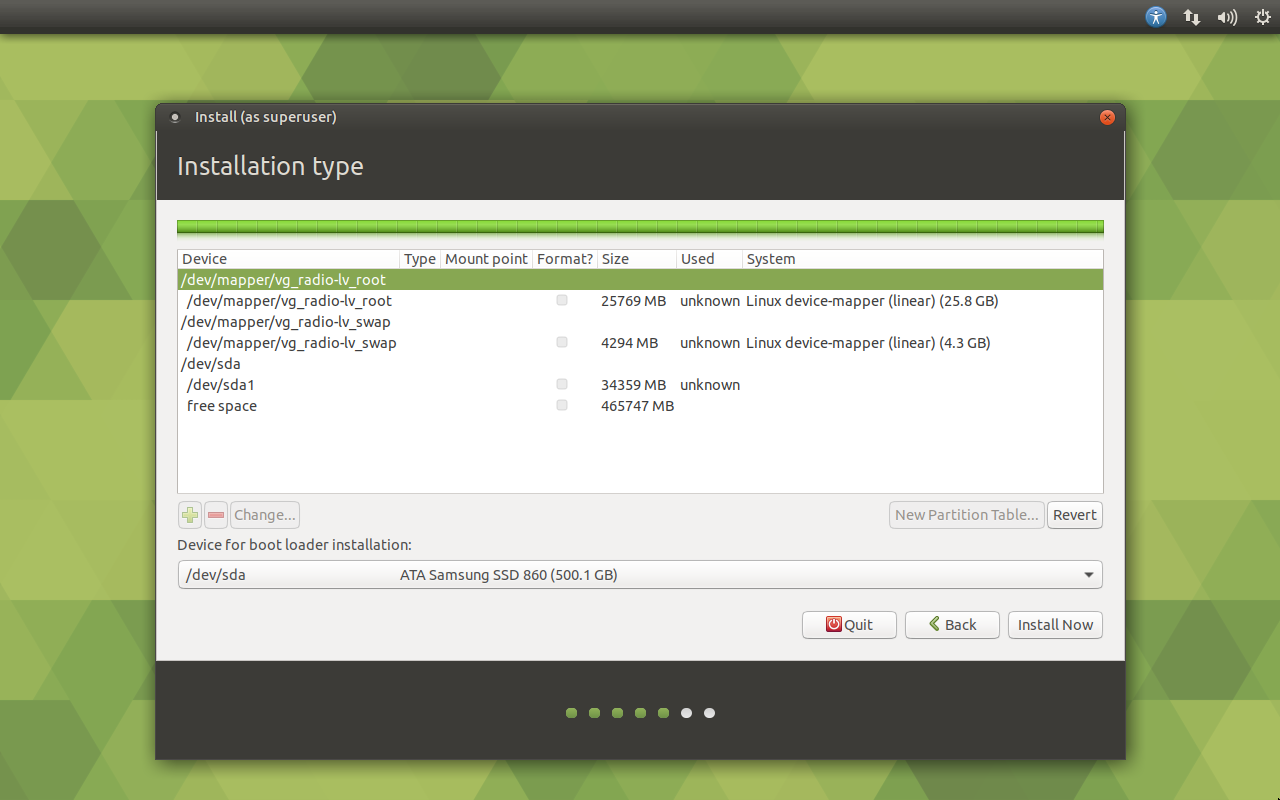
After setting up LVM, close the terminal and return to the installer. Again, select Something else and click on the Continue button. Most likely from the first time our partitions will not appear in the installer disk partitioning window. Just click on the Back button and select Something else again and click on the Continue button.
To start, select the /dev/mapper/vg_radio-lv_root partition that we have defined for root partition and click the Change button. In the section editing window, select the type of Ext4 file system, put a check mark to format the partition and select the mount point /, then click on the OK button.
Now select the /dev/mapper/vg_radio-lv_swap section and click the Change button. In the next window, select the swap area partition type and click OK.
As a device to install the bootloader, we leave the default drive /dev/sda.
Now click on the Install Now to start installation Ubuntu MATE on our drive.
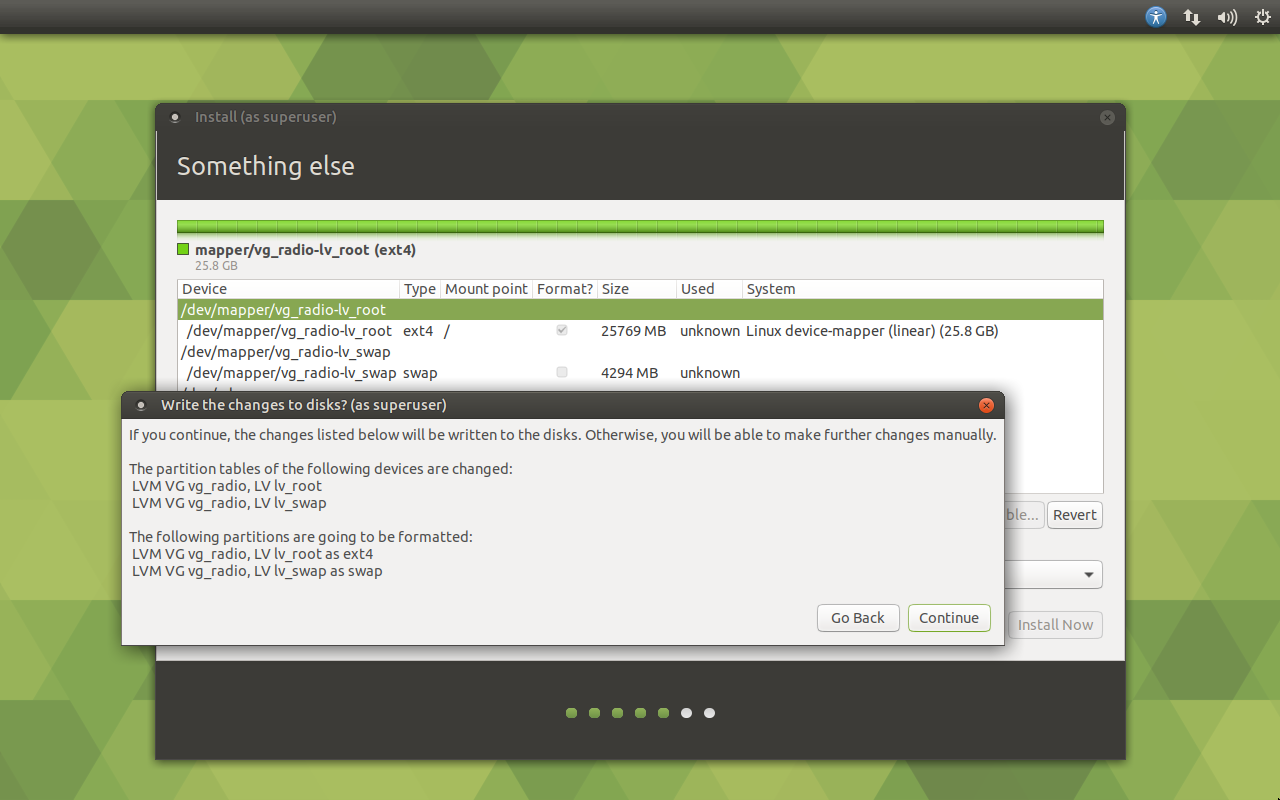
The installer will show us the changes we have made to the partitions. To continue the installation, click on the Continue button.
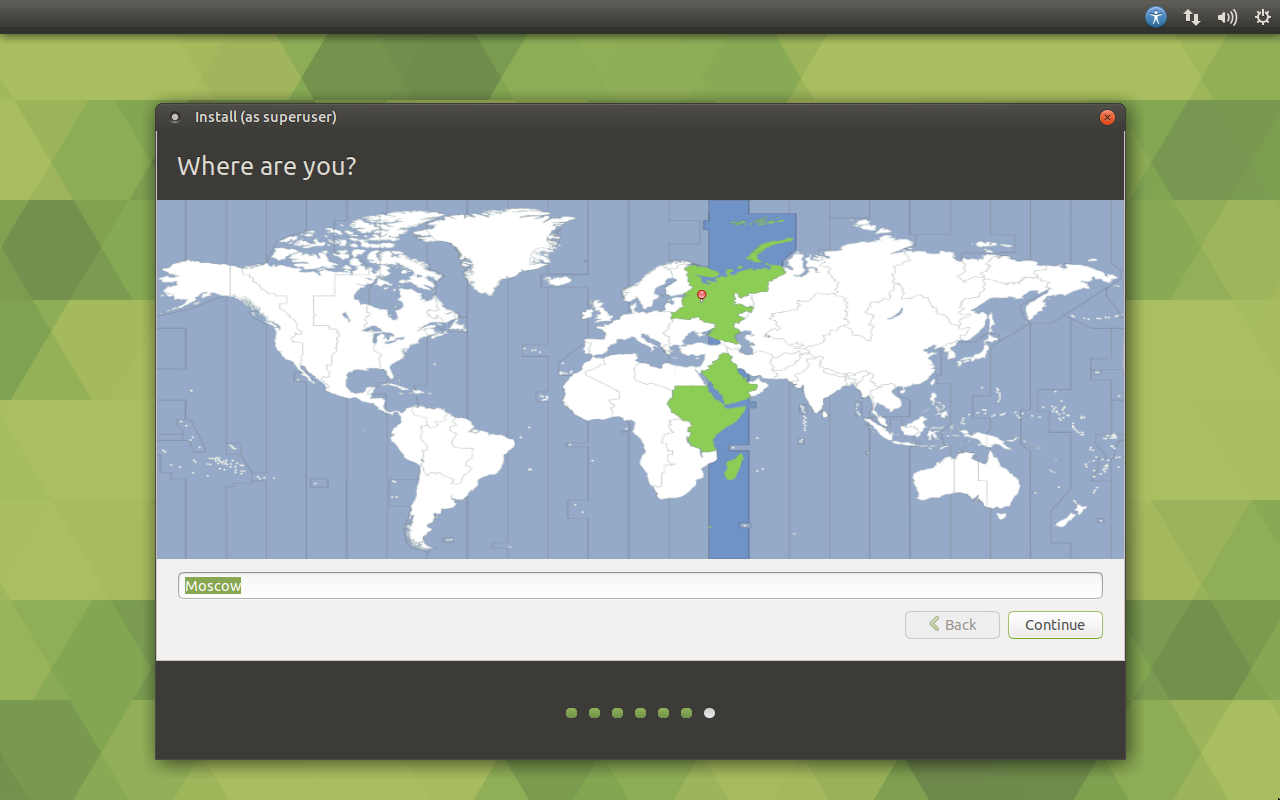
The penultimate step before installation, we need to choose the time zone. Click the mouse on your and click on the Continue button.
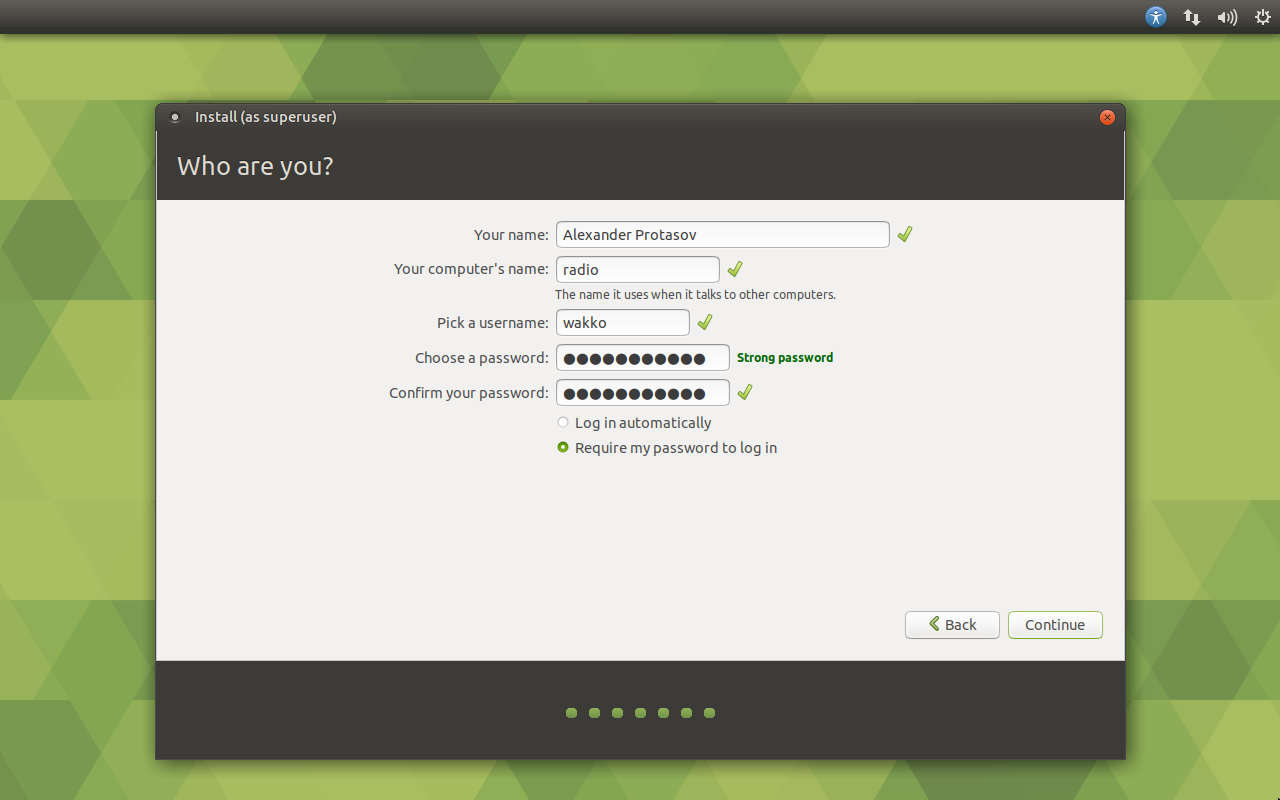
Before the installation itself, you will need to enter the name of the computer and the data necessary to create a user under which we will work. Fill in the form and click on the Continue button.
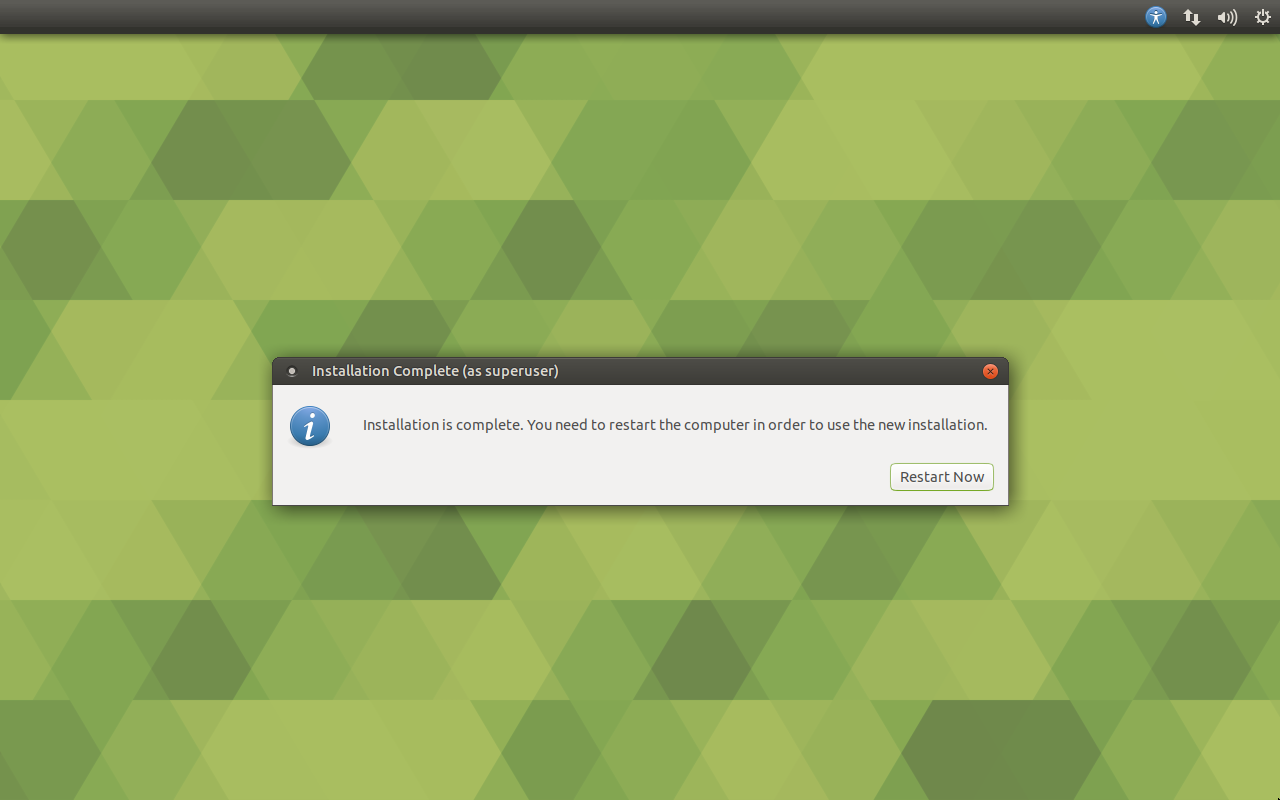
After installation, you will see a message that the installation is complete, where you will need to click on the Restart Now button to restart the virtual machine.
Before rebooting, the installer will ask us to remove the mounted .iso image and press Enter to continue. But since the installer itself will execute the eject command before displaying this message - the .iso image is automatically unmounted, so just press the Enter button.
System update after installation.
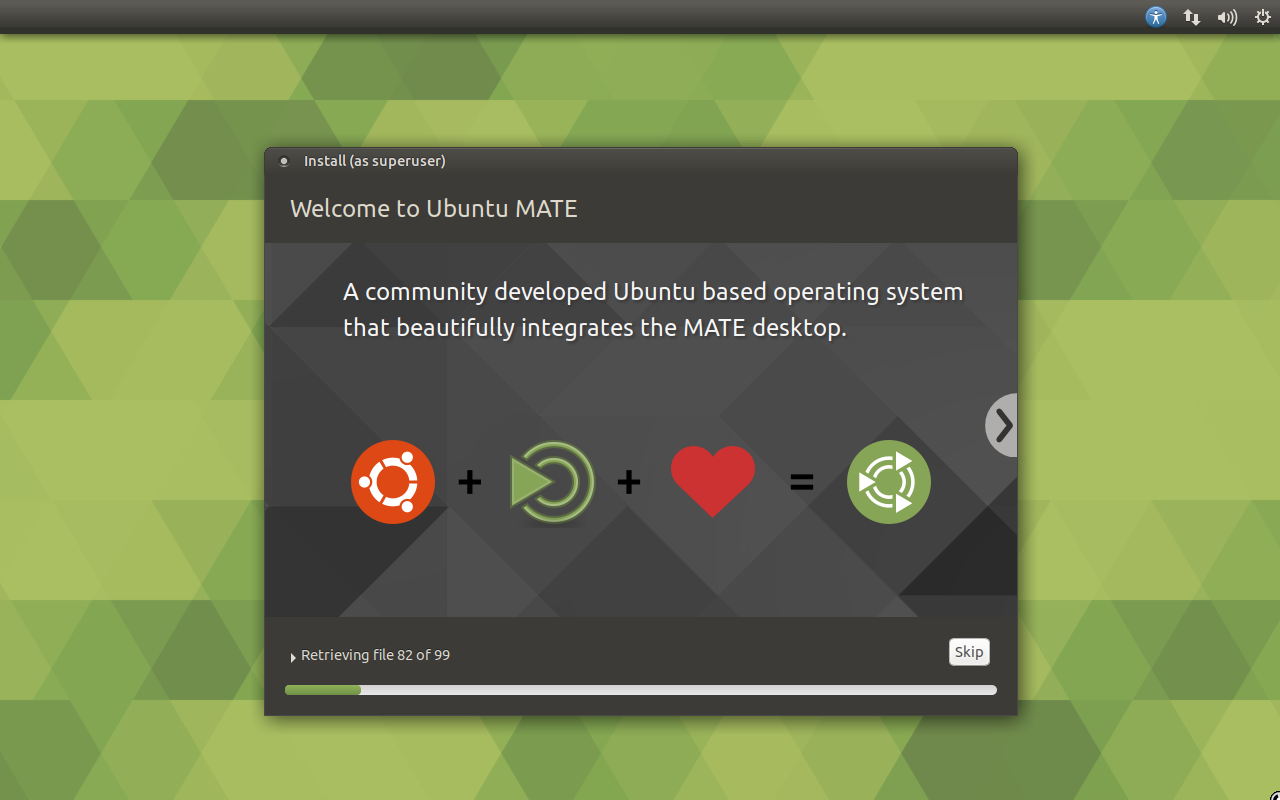
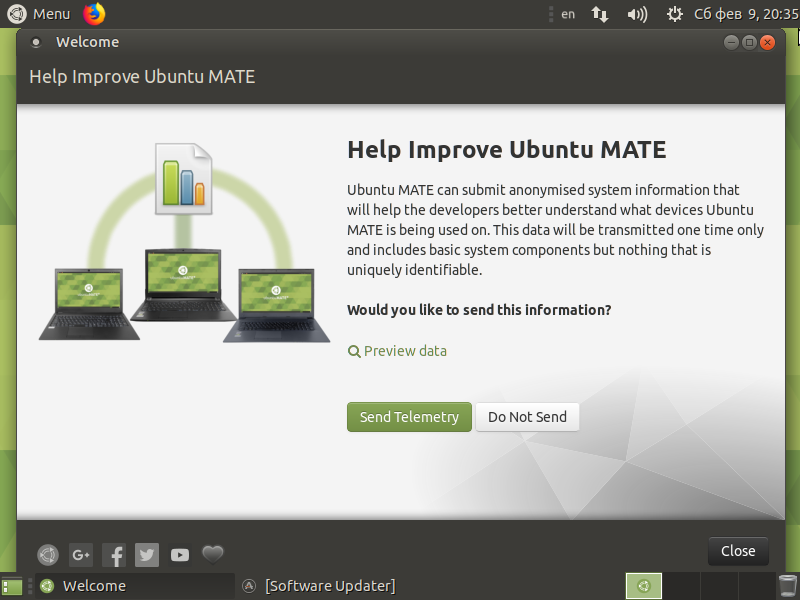
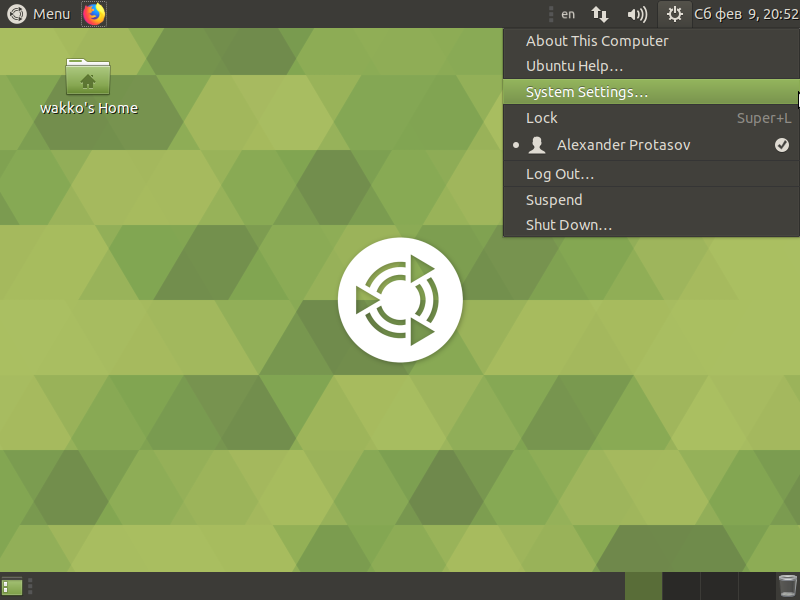
After we have logged into the system for the first time – the Welcome application will start, which will immediately ask if we want to collect telemetry and send it to the developers. Click on the button Do Not Send.
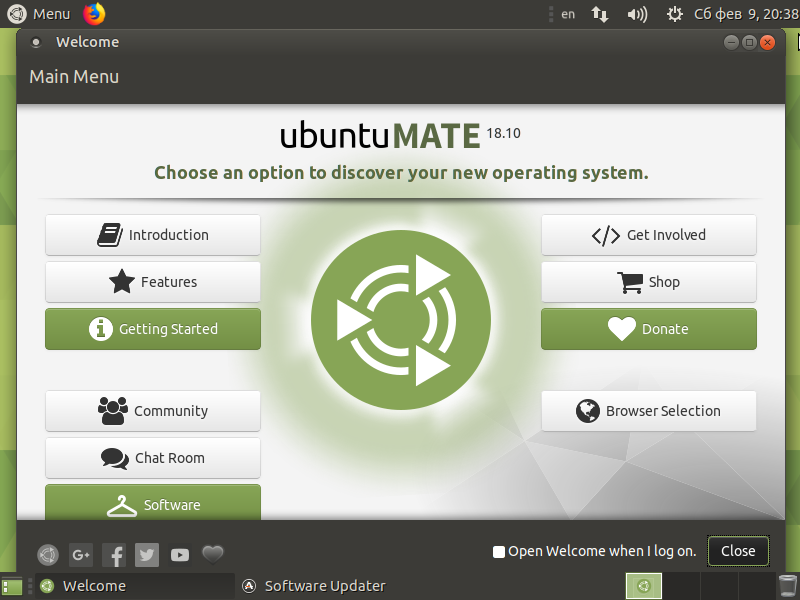
In the next application window, uncheck the Open Welcome when I log on item and click the Close button to stop this application from running.
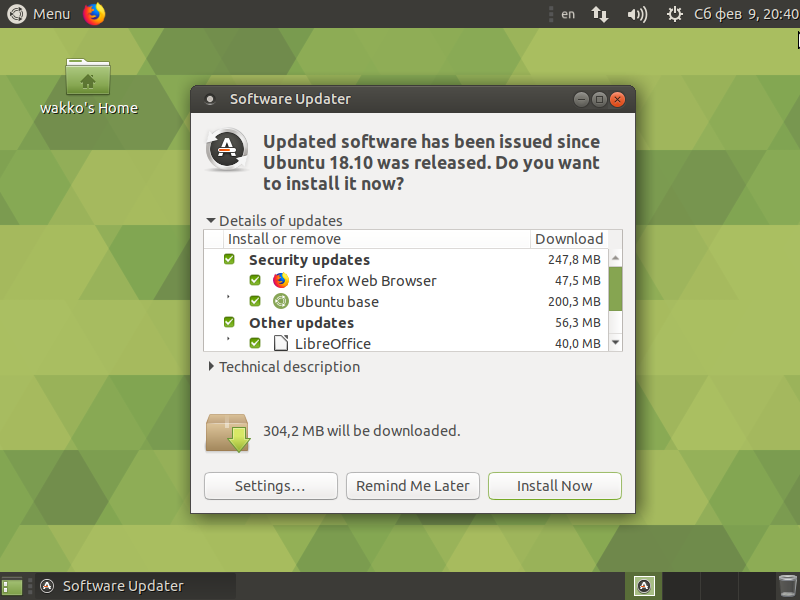
As you can see on the screen, we have already launched Software Updater, just click on the name of this application on taskbar. As we can see, there are a lot of updates, click on the Install Now button to install them.
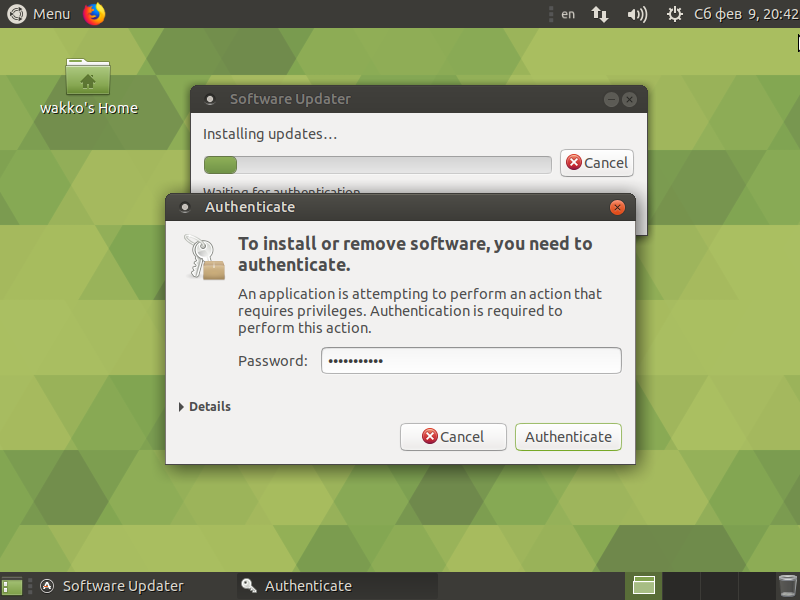
To install updates, you need root user rights, so enter your password and click on the Authenticate button in the elevation window.
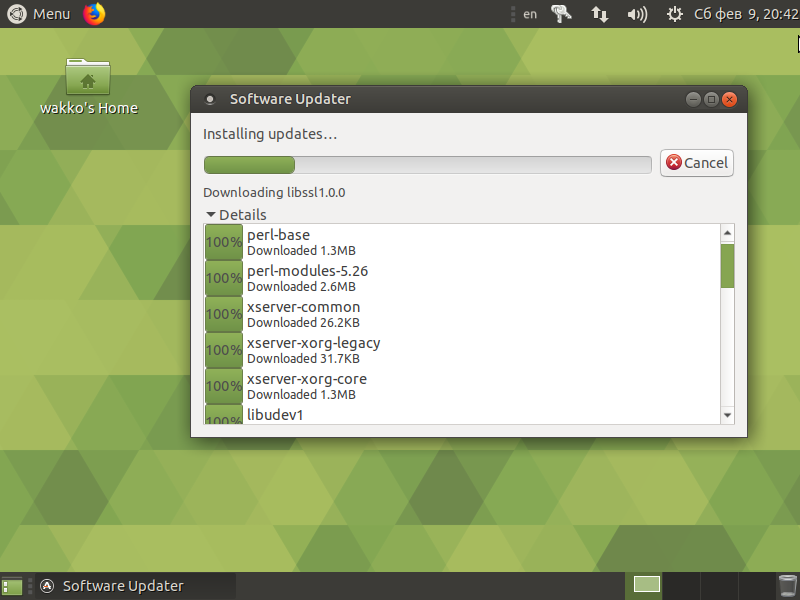
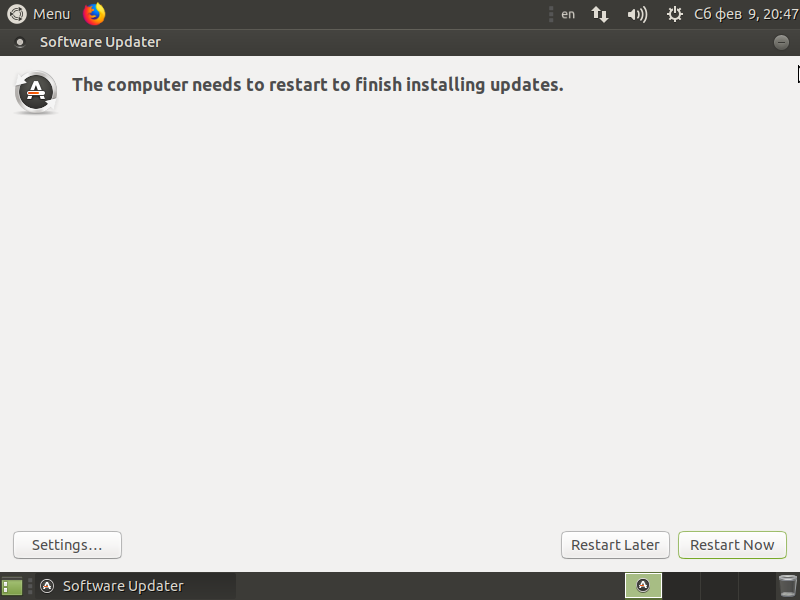
Applications will be downloaded first and then installed. After installing the updates, a message will appear in which you will need to click Restart Now to restart.

Setup after installation.
Screen setup.
After rebooting, Ubuntu MATE will start in graphics mode, but with a resolution of 800x600.
If you use Parallels Desktop, you can change the resolution only after installing Parallels Tools. In the Parallels Desktop menu, select Install Parallels Tools from the Actions menu. After mounting the image with Parallels Tools, the image will automatically mount and open in Ubuntu. Double-click on the
install-guiicon to install. Enter the password and click on OK. After installation, click on the Reboot button.
In the case of VMware ESXi or in the case of installing Ubuntu on bare metal, just open the control center, then in the Hardware block, open the Displays item and choose any resolution you like from the list, then click on the Apply button, and then on the Keep This Configuration button, if the selected resolution suits us.
In order to enable scaling, in the control center in the Look and Feel block, run the MATE Tweak applet. Then, in the left menu, select the Windows section and in the HiDPI item, instead of the Auto-detect value, select HiDPI.
Now the interface becomes beauty. :)
A little tip for MacBook users with Retina displays. If you want to use the built-in macOS Screen Sharing, then when you connect to a remote computer via VNC, the default scale will be, let's say, not optimal and I did not find the option to change this scale correctly, you can only manually stretch the connection window. It is best to use on Mac VNC Viewer from RealVNC. In this program, in the connection settings in the Options tab, set the Scaling parameter to
50%. Now, when you use this connection, the correct scale will be automatically set.
Terminal setup:
Start the terminal (right-click on the desktop and select the menu item Open Terminal) and the first thing we do is run the command:
$ gsettings set org.mate.caja-open-terminal desktop-opens-home-dir trueThis is necessary for the terminal to start with the shell located in the home folder by default, and not in the Desktop folder.
Add yourself a little right, they will be useful in the future:
$ sudo usermod -a -G bluetooth,dialout,lp,netdev,plugdev wakkoNext, we run a number of commands to configure the terminal:
$ gsettings set org.mate.terminal.keybindings help 'disabled'
$ gsettings set org.mate.terminal.keybindings new-tab '<Super>t'
$ gsettings set org.mate.terminal.keybindings close-tab '<Super>w'
$ gsettings set org.mate.terminal.keybindings new-window '<Super>n'
$ gsettings set org.mate.terminal.keybindings close-window '<Super>q'
$ gsettings set org.mate.terminal.keybindings copy '<Super>c'
$ gsettings set org.mate.terminal.keybindings paste '<Super>v'
$ gsettings set org.mate.terminal.keybindings select-all '<Super>a'
$ gsettings set org.mate.terminal.keybindings search-find '<Super>f'
$ gsettings set org.mate.terminal.keybindings full-screen '<Super>Return'
$ gsettings set org.mate.terminal.keybindings next-tab '<Super>braceright'
$ gsettings set org.mate.terminal.keybindings prev-tab '<Super>braceleft'
$ gsettings set org.mate.terminal.keybindings switch-to-tab-1 '<Super>1'
$ gsettings set org.mate.terminal.keybindings switch-to-tab-2 '<Super>2'
$ gsettings set org.mate.terminal.keybindings switch-to-tab-3 '<Super>3'
$ gsettings set org.mate.terminal.keybindings switch-to-tab-4 '<Super>4'
$ gsettings set org.mate.terminal.keybindings switch-to-tab-5 '<Super>5'
$ gsettings set org.mate.terminal.keybindings switch-to-tab-6 '<Super>6'
$ gsettings set org.mate.terminal.keybindings switch-to-tab-7 '<Super>7'
$ gsettings set org.mate.terminal.keybindings switch-to-tab-8 '<Super>8'
$ gsettings set org.mate.terminal.keybindings switch-to-tab-9 '<Super>9'
$ gsettings set org.mate.terminal.keybindings switch-to-tab-10 '<Super>0'
$ gsettings set org.mate.terminal.profile:/org/mate/terminal/profiles/default/ allow-bold true
$ gsettings set org.mate.terminal.profile:/org/mate/terminal/profiles/default/ font 'Monospace 10'
$ gsettings set org.mate.terminal.profile:/org/mate/terminal/profiles/default/ use-system-font false
$ gsettings set org.mate.terminal.profile:/org/mate/terminal/profiles/default/ custom-command 'env TERM=xterm-256color /bin/bash'
$ gsettings set org.mate.terminal.profile:/org/mate/terminal/profiles/default/ use-custom-command true
$ gsettings set org.mate.terminal.profile:/org/mate/terminal/profiles/default/ default-size-columns 110
$ gsettings set org.mate.terminal.profile:/org/mate/terminal/profiles/default/ default-size-rows 36
$ gsettings set org.mate.terminal.profile:/org/mate/terminal/profiles/default/ use-custom-default-size true
$ gsettings set org.mate.terminal.profile:/org/mate/terminal/profiles/default/ scrollbar-position 'hidden'
Then restart the terminal.
Working environments setup:
$ gsettings set org.mate.caja.preferences default-folder-viewer 'list-view'
$ gsettings set org.mate.caja.window-state sidebar-width 80
$ gsettings set org.mate.caja.window-state geometry '900x600+0+28'
$ gsettings set org.mate.interface enable-animations false
$ gsettings set org.mate.mate-menu hot-key ''
$ gsettings set com.solus-project.brisk-menu hot-key ''
$ gsettings set org.mate.Marco.global-keybindings panel-run-dialog '<Super>r'
$ gsettings set org.mate.media-handling automount-open false
$ gsettings set org.mate.media-handling automount false
$ gsettings set org.mate.power-manager button-power shutdown
$ gsettings set org.mate.screensaver lock-enabled true
$ gsettings set org.mate.screensaver idle-activation-enabled false
$ gsettings set org.mate.screensaver themes []
Clock in tray setup:
$ gsettings set org.mate.panel.applet.clock:/org/mate/panel/objects/clock/prefs/ show-seconds true
$ gsettings set org.mate.panel.applet.clock:/org/mate/panel/objects/clock/prefs/ show-temperature false
$ gsettings set org.mate.panel.applet.clock:/org/mate/panel/objects/clock/prefs/ show-weather false
Desktop setup (setting black background, for smooth working in VNC):
$ gsettings set org.mate.background picture-filename ''
$ gsettings set org.mate.background color-shading-type 'solid'
$ gsettings set org.mate.background primary-color 'rgb(0,0,0)'
Keyboard layout setup:
$ gsettings set org.mate.peripherals-keyboard delay 300
$ gsettings set org.mate.peripherals-keyboard rate 50
$ gsettings set org.mate.peripherals-keyboard-xkb.kbd layouts "['us', 'ru']"
$ gsettings set org.mate.peripherals-keyboard-xkb.kbd options "['grp_led\tgrp_led:scroll', 'grp\tgrp:ctrl_shift_toggle']"
$ gsettings set org.mate.peripherals-keyboard-xkb.indicator font-family 'Ubuntu 14'
Now install Midnight Commander and a bunch of additional utilities:
$ sudo apt install mc atop htop iotop curl lsscsi pinfo screenFor some reason, if you run the command apt autoremove in a newly installed Ubuntu MATE we are offered to remove more than 100 packages. We don't need the main part, but the lvm2 package can be useful for us. So will mark as having been manually installed lvm2 and then will run autoremove task:
$ sudo apt-mark manual lvm2
$ sudo apt autoremove
Install and configure SSH server:
$ sudo apt install openssh-serverRemove the 30 second wait for the grub boot loader during startup Ubuntu:
$ sudo nano -w /etc/default/grub
GRUB_RECORDFAIL_TIMEOUT=2
$ sudo update-grub
Install and configure TigerVNC:
$ sudo apt install tigervnc-scraping-server tigervnc-standalone-server
$ vncpasswd
Password:
Verify:
Would you like to enter a view-only password (y/n)? n
Run this command and try to connect VNC to port 5900:
$ x0vncserver -passwordfile /home/wakko/.vnc/passwd -display :0This command allows you to connect to the display :0 (physical display). You need to perform it after our user logged in to the physical console.
The following command will create a virtual display :1 with the specified resolution. After it is done, you can connect via VNC to port 5901:
$ vncserver -localhost no -geometry 2048x1536 :1If we were able to connect and everything works, then run the command to complete the VNC server:
$ vncserver -kill :1And then make the VNC server start automatically when you start Ubuntu:
$ sudo systemctl edit --force --full vncserver@:1.service
[Unit]
Description=Virtual Network Computing (VNC)
After=syslog.target network.target

[Service]
Type=simple
User=wakko
PAMName=login
PIDFile=/home/%u/.vnc/%H%i.pid
Restart=always
RestartSec=2
ExecStartPre=/bin/sh -c '/usr/bin/vncserver -kill %i > /dev/null 2>&1 || :'
ExecStart=/usr/bin/vncserver -localhost no -geometry 2048x1536 -alwaysshared -fg %i
ExecStop=/bin/sh -c '/usr/bin/vncserver -kill %i > /dev/null 2>&1 || :'

[Install]
WantedBy=multi-user.target
$ sudo systemctl enable vncserver@:1.service
$ sudo systemctl start vncserver@:1.service
To connect via VNC, I use VNC Viewer from RealVNC, because this client first works fine input of Russian characters, and secondly the client is able to scale the screen, which in the case of HiDPI is very useful, and thirdly, in the connection settings, you can reassign the modifier keys Option/Command. In connection settings, I change the following items:
AutoReconnect: False
ColorLevel: full
EnableToolbar: False
FullScreen: False
LeftCmdKey: Super_L
LeftOptKey: Alt_L
MenuKey: F12
RelativePtr: False
RightCmdKey: Super_R
RightOptKey: Alt_R
Scaling: 50%
SendMediaKeys: False
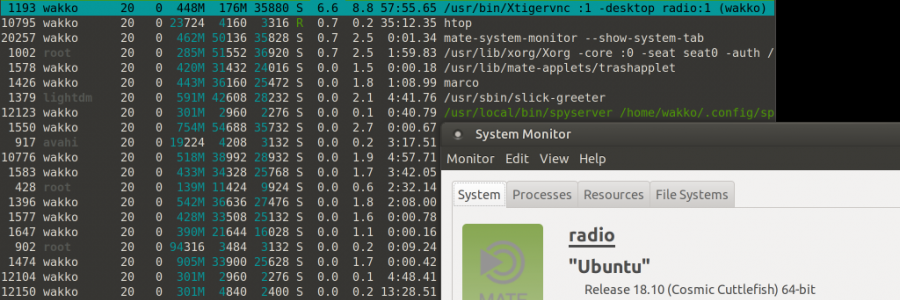
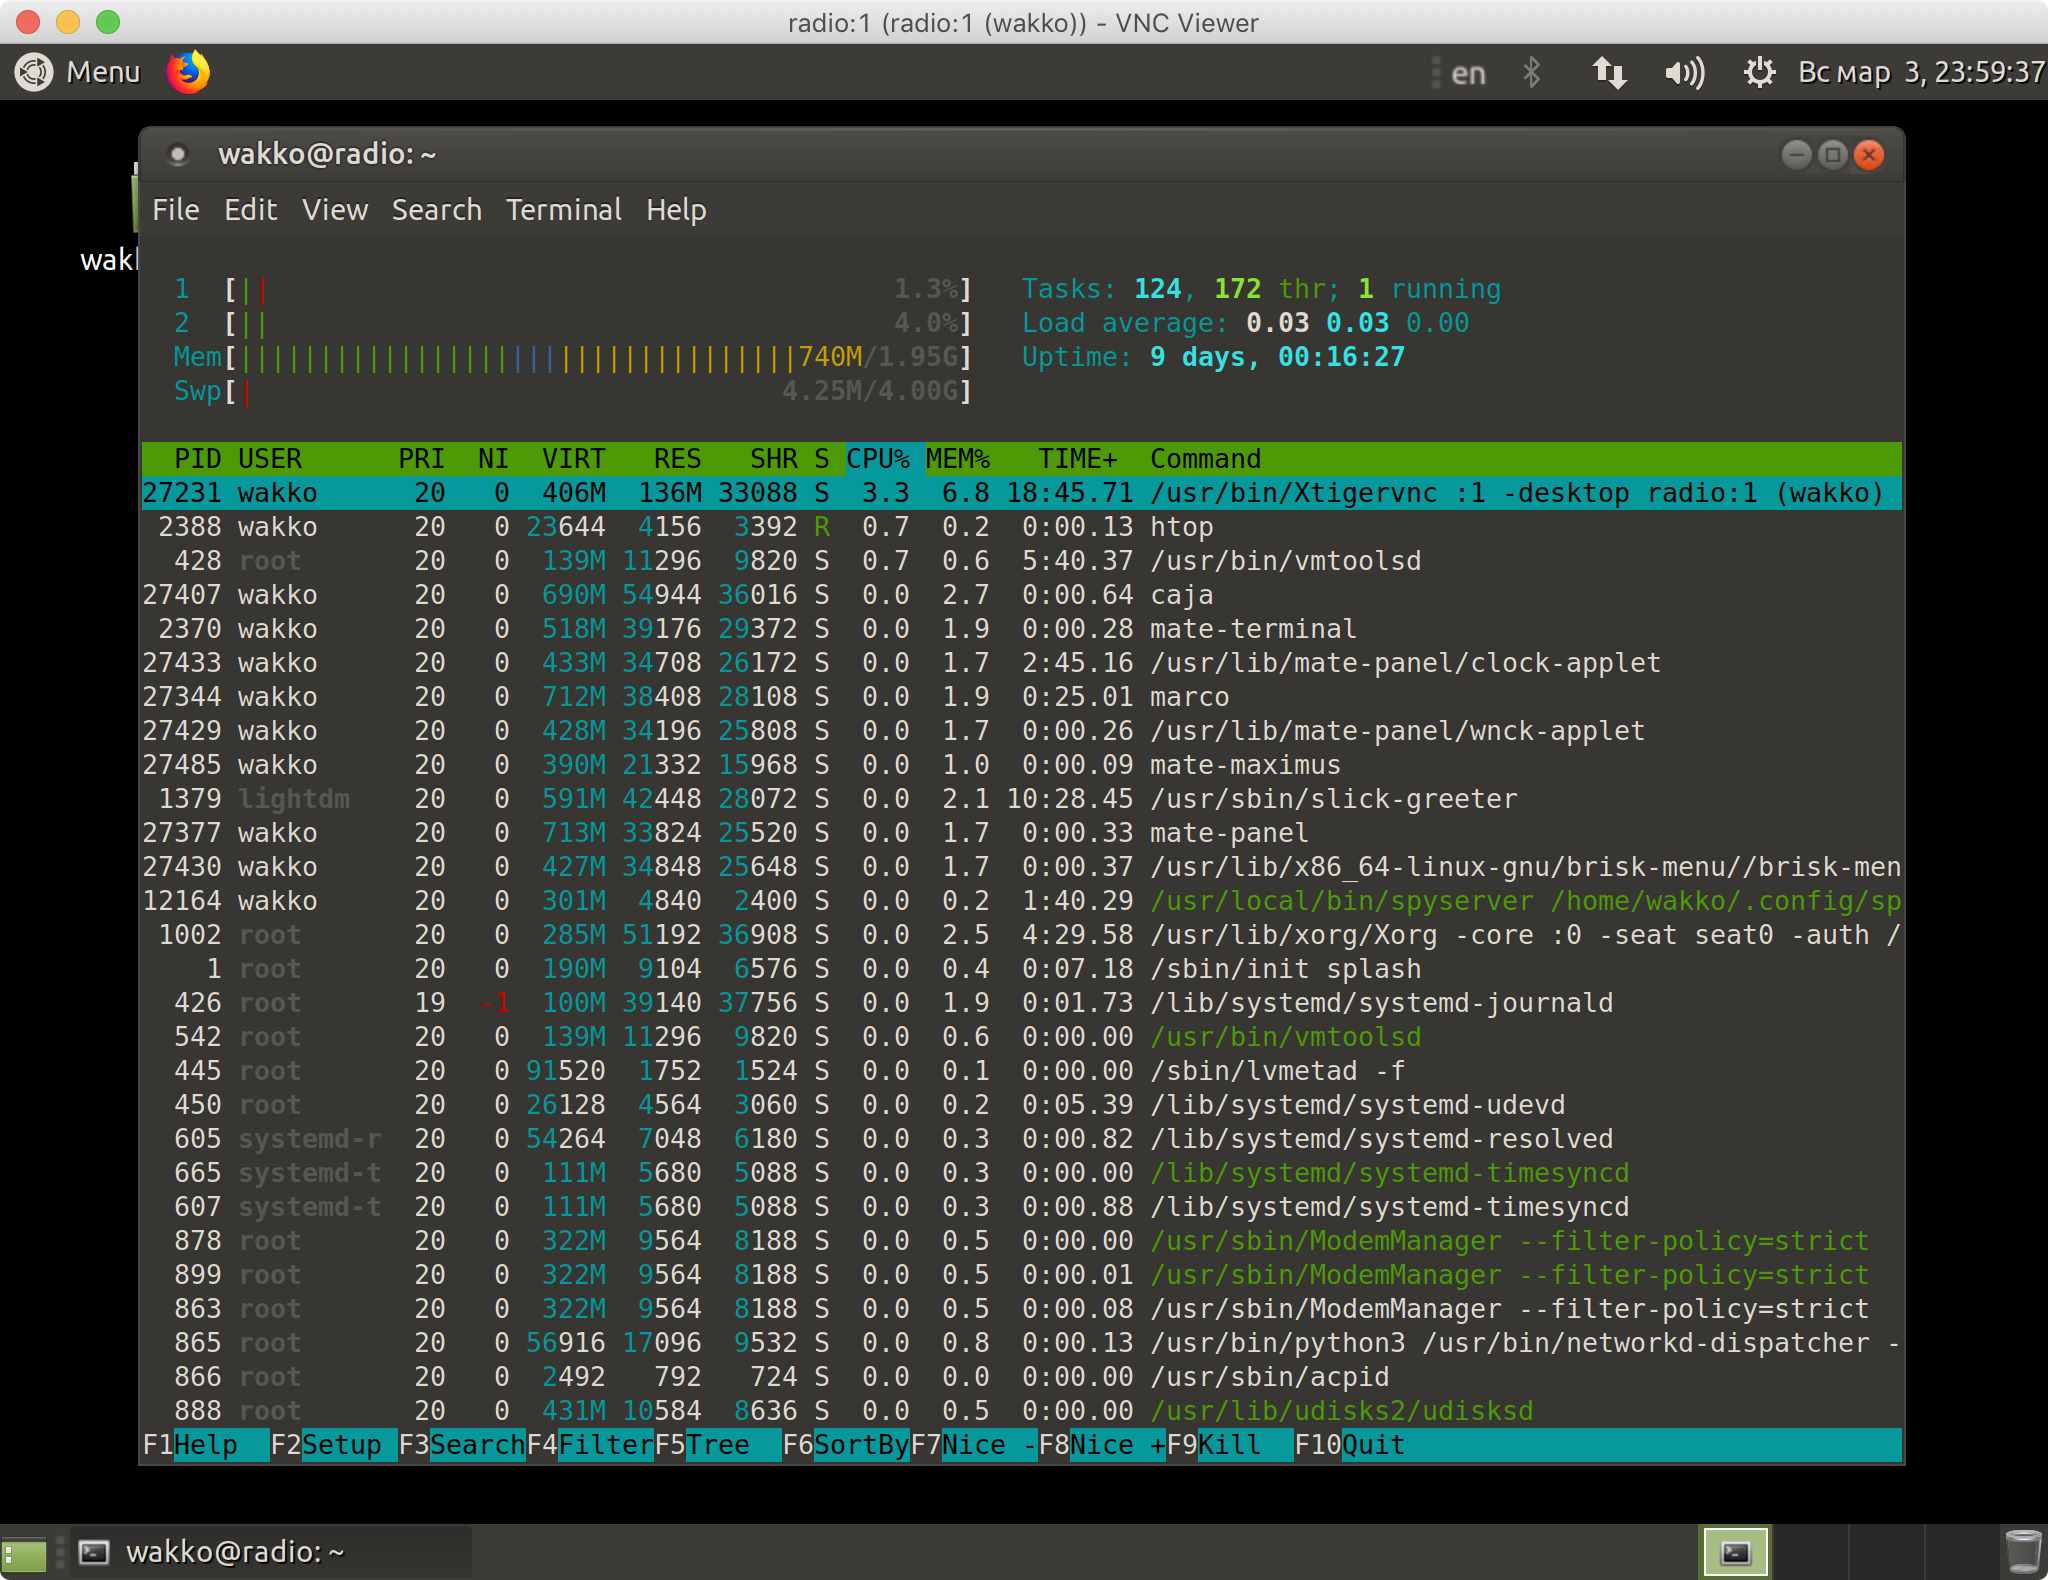
SendSpecialKeys: FalseAfter connecting to VNC we get about this beauty:
It remains only on this note to configure the working environment in the console and our Ubuntu is ready to work.