SpyServer is a free RTL-SDR compatible SDR server designed to work with SDR# software. It was originally developed for AirSpy SDR receivers, but the author also made it compatible with RTL-SDR receivers. SpyServer enables you to connect remotely and use the SDR receivers. The main difference between spyserver and rtl_tcp is that it requires less network bandwidth, because not the entire data stream is transmitted over the network, but only the IQ-stream of the current frequency. The picture of the waterfall is formed on the server and transmitted to SDR# in compressed form. However, this behavior has a disadvantage – spyserver requires a processor a little more powerful than to work with rtl_tcp.
Preparing to work with RTL-SDR receivers:
Install utilities to work with receivers rtl-sdr:
$ sudo apt install rtl-sdrNext, check the operation of the connected SDR receiver. In an perfect world, it should look something like this:
$ rtl_test
Found 1 device(s):
  0:  Realtek, RTL2838UHIDIR, SN: 00000001

Using device 0: Generic RTL2832U OEM
Detached kernel driver
Found Rafael Micro R820T tuner
Supported gain values (29): 0.0 0.9 1.4 2.7 3.7 7.7 8.7 12.5 14.4 15.7 16.6 19.7 20.7 22.9 25.4 28.0 29.7 32.8 33.8 36.4 37.2 38.6 40.2 42.1 43.4 43.9 44.5 48.0 49.6
[R82XX] PLL not locked!
Sampling at 2048000 S/s.

Info: This tool will continuously read from the device, and report if
samples get lost. If you observe no further output, everything is fine.

Reading samples in async mode...
Allocating 15 zero-copy buffers
lost at least 28 bytes
But the first time you can get so:
$ rtl_test
Found 1 device(s):
  0:  , , SN:

  Using device 0: Generic RTL2832U OEM
  usb_open error -3
  Please fix the device permissions, e.g. by installing the udev rules file rtl-sdr.rules
  Failed to open rtlsdr device #0.
Or even so:
$ rtl_test
Found 1 device(s):
  0:  Realtek, RTL2838UHIDIR, SN: 00000001

  Using device 0: Generic RTL2832U OEM

  Kernel driver is active, or device is claimed by second instance of librtlsdr.
  In the first case, please either detach or blacklist the kernel module
  (dvb_usb_rtl28xxu), or enable automatic detaching at compile time.

  usb_claim_interface error -6
  Failed to open rtlsdr device #0.
It is quite simple to fix these errors – you need to unload some kernel modules from memory and blacklist them:
$ sudo rmmod dvb_usb_rtl28xxu dvb_usb_v2 e4000 rtl2832
$ sudo nano -w /etc/modprobe.d/rtl-sdr-blacklist.conf
blacklist dvb_core
blacklist dvb_usb_rtl28xxu
blacklist dvb_usb_v2
blacklist e4000
blacklist rtl2832
Connection of the AirSpy mini / R2 SDR receivers
Install the utility kit for AirSpy mini / R2 SDR receivers:
$ sudo apt install airspyThen check if the SDR receiver has been determined:
$ sudo airspy_info
airspy_lib_version: 1.0.9

Found AirSpy board 1
Board ID Number: 0 (AIRSPY)
Firmware Version: AirSpy MINI v1.0.0-rc9-0-ga56adfd 2016-06-12V
Part ID Number: 0x6906002B 0x00000030
Serial Number: 0x061C67DC286C91A3
Supported sample rates:
    6.000000 MSPS
    3.000000 MSPS
Close board 1
Next, try to run this command as a normal user:
$ airspy_info
airspy_lib_version: 1.0.9
airspy_open() board 1 failed: AIRSPY_ERROR_NOT_FOUND (-5)
If you run this command as a standard user, you receive an AIRSPY_ERROR_NOT_FOUND (-5) error, which means that the user does not have sufficient rights to access the SDR receiver. Let's correct this situation:
$ sudo usermod -a -G plugdev `whoami`After including the user in the plugdev group, you need to log out and log in again and you can try again:
$ airspy_info
airspy_lib_version: 1.0.9

Found AirSpy board 1
Board ID Number: 0 (AIRSPY)
Firmware Version: AirSpy MINI v1.0.0-rc9-0-ga56adfd 2016-06-12V
Part ID Number: 0x6906002B 0x00000030
Serial Number: 0x061C67DC286C91A3
Supported sample rates:
    6.000000 MSPS
    3.000000 MSPS
Close board 1
Now you can use SDR receiver with normal users rights.
By the way, the output of the airspy_info command shows that the firmware version of the SDR receiver is 1.0.0-rc9, and the latest is 1.0.0rc10. To update the firmware, open the page with firmware, download the latest firmware
airspy_fw_v1.0.0-rc10.zip
and update SDR receiver:
$ wget https://github.com/airspy/airspyone_firmware/releases/download/v1.0.0-rc10/airspy_fw_v1.0.0-rc10.zip
$ unzip airspy_fw_v1.0.0-rc10.zip
$ rm -f airspy_fw_v1.0.0-rc10.zip
$ cd airspy_fw_v1.0.0-rc10/
$ airspy_spiflash -w airspy_rom_to_ram.bin -s 0x061C67DC286C91A3
Board serial number to open: 0x061C67DC286C91A3
File size 21508 bytes.
Erasing 1st 64KB in SPI flash.
Writing 256 bytes at 0x000000.
...
Writing 256 bytes at 0x005300.
Writing 4 bytes at 0x005400.
Next, disconnect the SDR receiver, after a few seconds, connect it back and see if the firmware has been updated on it:
$ airspy_info
airspy_lib_version: 1.0.9

Found AirSpy board 1
Board ID Number: 0 (AIRSPY)
Firmware Version: AirSpy MINI v1.0.0-rc10-0-g946184a 2016-09-19
Part ID Number: 0x6906002B 0x00000030
Serial Number: 0x061C67DC286C91A3
Supported sample rates:
    6.000000 MSPS
    3.000000 MSPS
Close board 1
Installing and configuring SpyServer
Now open the page https://airspy.com/download/ and install SpyServer. To do this, download the file
spyserver-linux-x64.tgz
for 64-bit x86-systems, file
spyserver-linux-x86.tgz
for 32-bit x86-systems and file
spyserver-arm32.tgz
for systems with ARM CPU (Raspberry Pi, ASUS Tinker Board, Odroid, NanoPi NEO, etc.).
$ wget https://airspy.com/downloads/spyserver-linux-x64.tgz
$ tar zxvf spyserver-linux-x64.tgz
$ rm -f spyserver-linux-x64.tgz
$ sudo mv spyserver /usr/local/bin/
$ sudo mv spyserver_ping /usr/local/bin/
$ sed -i 's/\r//g' spyserver.config
$ mkdir -p ~/.config/spyserver
$ mv spyserver.config ~/.config/spyserver/
It is best way to create own configuration file for each device:
$ cp ~/.config/spyserver/spyserver.config ~/.config/spyserver/spyserver.mini.config
$ nano -w ~/.config/spyserver/spyserver.mini.config
bind_host = 0.0.0.0
bind_port = 5555
list_in_directory = 0
maximum_clients = 1
allow_control = 1
device_type = AirspyOne
device_serial = 0x061C67DC286C91A3
minimum_frequency = 24000000
maximum_frequency = 1750000000
initial_gain = 17
enable_bias_tee = 0
Option initial_gain will need later to find experimentally. In the name of the configuration file instead of mini - you can specify any alias, I have myself using aliases mini (AirSpy mini), mini-gain (AirSpy mini for which the Bias-Tee parameter is enabled, since LNA is connected to this SDR receiver), hf (AirSpy HF+), rtl1 (RTL-SDR), rtl2 (RTL-SDR), etc. These aliases will be further used to create services in systemd, for autorun of SpyServer.
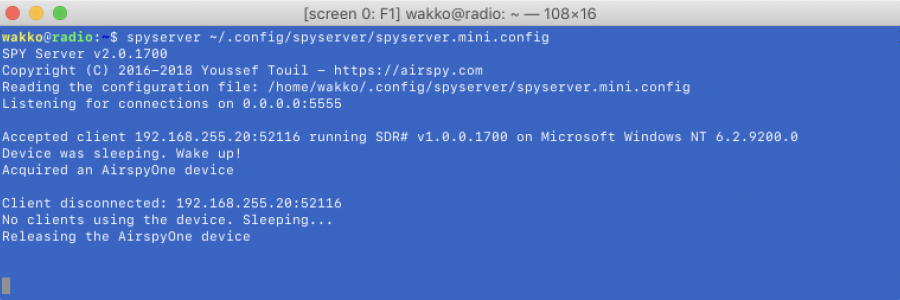
Try to start SpyServer and connect to it from SDR#. Again, in the perfect world, SDR# will connect immediately without errors, and the output in the console will be as follows:
$ spyserver ~/.config/spyserver/spyserver.mini.config
SPY Server v2.0.1700
Copyright (C) 2016-2018 Youssef Touil - https://airspy.com
Reading the configuration file: /home/wakko/.config/spyserver/spyserver.mini.config
Listening for connections on 0.0.0.0:5555
Accepted client 192.168.255.20:52246 running SDR# v1.0.0.1700 on Microsoft Windows NT 6.2.9200.0
Device was sleeping. Wake up!
Acquired an AirspyOne device
If everything worked out the first time - you're lucky! Buy a lottery ticket and go to configuring autostart settings. But if SDR# gave an error Server is busy, and the message Could not acquire the device appeared in the console - then the installed libraries from the libairspy0 package are not compatible with the installed SpyServer, in this case we will compile and install these libraries from sources:
$ sudo apt remove airspy libairspy0
$ sudo apt install build-essential cmake libusb-1.0-0-dev pkg-config
$ wget https://github.com/airspy/airspyone_host/archive/master.zip
$ unzip master.zip
$ rm -f master.zip
$ cd airspyone_host-master/
$ mkdir build
$ cd build/
$ cmake ../ -DINSTALL_UDEV_RULES=ON
$ make
$ sudo make install
$ sudo ldconfig
$ cd ../../
$ rm -rf airspyone_host-master/
If you have an SDR receiver AirSpy HF+, you need to install libraries and utilities for HF+:
$ wget https://github.com/airspy/airspyhf/archive/master.zip
$ unzip master.zip
$ rm -f master.zip
$ cd airspyhf-master/
$ mkdir build
$ cd build/
$ cmake ../ -DINSTALL_UDEV_RULES=ON
$ make
$ sudo make install
$ sudo ldconfig
$ cd ../../
$ rm -rf airspyhf-master/
After installing the libraries, again try to run SpyServer and connect to it from SDR#:
$ spyserver ~/.config/spyserver/spyserver.mini.config
SPY Server v2.0.1700
Copyright (C) 2016-2018 Youssef Touil - https://airspy.com
Reading the configuration file: /home/wakko/.config/spyserver/spyserver.mini.config
Listening for connections on 0.0.0.0:5555
Accepted client 192.168.255.20:52246 running SDR# v1.0.0.1700 on Microsoft Windows NT 6.2.9200.0
Device was sleeping. Wake up!
Acquired an AirspyOne device
Now it's all good! Let's start setting up autorun SpyServer as service.
Setting autostart in the systemd
Create a service file systemd:
$ sudo nano -w /etc/systemd/system/spyserver@.service
[Unit]
Description=Spy Server
After=network-online.target

[Service]
Type=simple
PAMName=login
Restart=always
RestartSec=2
ExecStartPre=/usr/bin/test -f ${HOME}/.config/spyserver/spyserver.%i.config
ExecStart=/usr/local/bin/spyserver ${HOME}/.config/spyserver/spyserver.%i.config
User=wakko

[Install]
WantedBy=multi-user.target

$ sudo systemctl daemon-reload
Now you can create services for each SDR receiver. As mentioned earlier, the configuration file names for SpyServer contain a device alias that is used to create the appropriate service in systemd. The example below uses a device with a mini alias:
$ sudo systemctl enable spyserver@mini.service
Created symlink /etc/systemd/system/multi-user.target.wants/spyserver@mini.service → /etc/systemd/system/spyserver@.service.
$ sudo systemctl start spyserver@mini.service
$ sudo systemctl status spyserver@mini.service
● spyserver@mini.service - Spy Server
   Loaded: loaded (/etc/systemd/system/spyserver@.service; enabled; vendor preset: enabled)
   Active: active (running) since Thu 2019-02-21 23:40:59 MSK; 3s ago
  Process: 31858 ExecStartPre=/usr/bin/test -f ${HOME}/.config/spyserver/spyserver.mini.config (code=exited, status=0/SUCCESS)
 Main PID: 31873 (spyserver)
    Tasks: 0 (limit: 4915)
   Memory: 576.0K
   CGroup: /system.slice/system-spyserver.slice/spyserver@mini.service
           ‣ 31873 /usr/local/bin/spyserver /home/wakko/.config/spyserver/spyserver.mini.config

Feb 21 23:40:59 radio systemd[1]: Starting Spy Server...
Feb 21 23:40:59 radio systemd[31858]: pam_unix(login:session): session opened for user wakko by (uid=0)
Feb 21 23:40:59 radio systemd[1]: Started Spy Server.
Feb 21 23:40:59 radio systemd[31873]: pam_unix(login:session): session opened for user wakko by (uid=0)
For each device you need to create and run own copy of the service commands:
$ sudo systemctl enable spyserver@alias.service
$ sudo systemctl start spyserver@alias.service
$ sudo systemctl status spyserver@alias.service
PS. If you have a device with a 64-bit ARM-processor (such as NanoPi NEO2 with ARM Cortex-A53 processor (Allwinner H5 64-bit ARM)), and whatever You do – still there is an error
Could not acquire the devicethen read here how to fix it. In a nutshell, the problem is that thelibairspylibrary is built 64-bit for theaarch64architecture, and thespyserverserver itself is compiled 32-bit for thearmhf(ARM hard-float) architecture, and therefore thelibairspylibrary must also be compiled 32-bit under the architecture ofarmhf.